
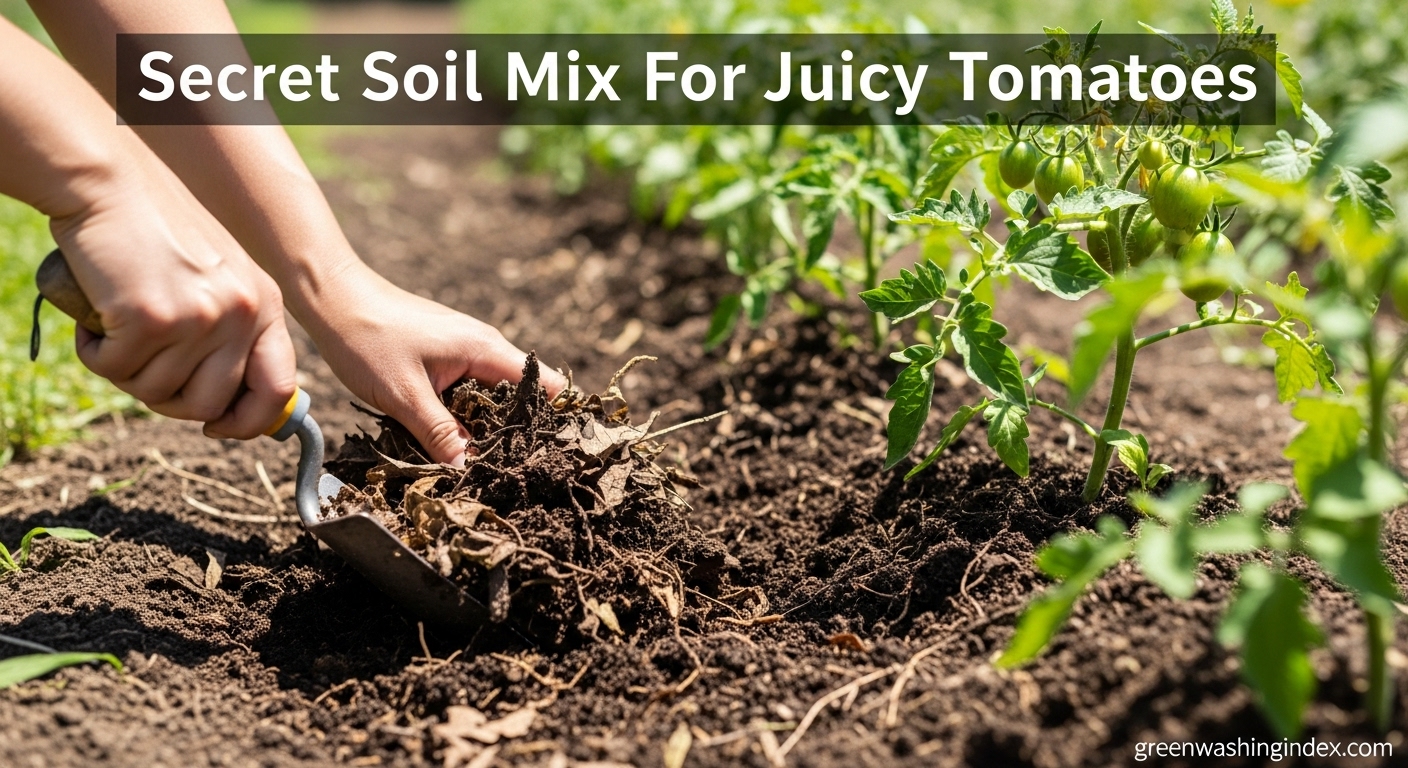
Growing juicy, flavorful tomatoes starts long before you plant that first seedling. I’ve learned through years of organic gardening that the secret to exceptional tomatoes lies in the soil preparation. When we create the perfect foundation using sustainable methods, our tomato plants reward us with healthier growth, better disease resistance, and significantly higher yields.
The best part? You don’t need synthetic chemicals or expensive fertilizers to achieve professional-level results. By focusing on organic soil preparation techniques, we’re not only growing better tomatoes but also contributing to a healthier ecosystem in our gardens. This comprehensive guide will walk you through every step of preparing your soil naturally, from testing and amending to the final preparation before planting.
Whether you’re working with clay soil, sandy conditions, or something in between, I’ll show you exactly how to transform your garden bed into the perfect home for thriving tomato plants. We’ll explore sustainable practices that build long-term soil health while providing immediate benefits for this season’s crop.
Tomatoes are surprisingly particular about their growing conditions, and understanding their specific needs is crucial for success. These plants thrive in well-draining soil that’s rich in organic matter, with a slightly acidic to neutral pH between 6.0 and 6.8. According to research from Oklahoma State University Extension, maintaining this pH range ensures optimal nutrient availability for tomato plants.
The ideal tomato soil should have a loamy texture that holds moisture without becoming waterlogged. This balance is critical because tomatoes need consistent moisture for proper fruit development, but excess water can lead to root rot and other fungal diseases. I’ve found that soil with about 3-4% organic matter content provides the perfect structure for both drainage and water retention.
Nutrient-wise, tomatoes are heavy feeders that require substantial amounts of nitrogen early in their growth for foliage development, then phosphorus and potassium as they begin flowering and fruiting. The soil should also contain adequate calcium to prevent blossom end rot, a common problem that ruins otherwise perfect tomatoes. Micronutrients like magnesium, iron, and boron play supporting roles in overall plant health and fruit quality.
The soil temperature is another critical factor often overlooked by home gardeners. Tomatoes prefer soil temperatures between 60-70°F for optimal root growth and nutrient uptake. In cooler climates, this means waiting until late spring to plant, while in warmer regions, soil preparation can begin earlier in the season.
Before adding any amendments, testing your soil provides the roadmap for successful preparation. I recommend conducting a comprehensive soil test at least 6-8 weeks before your planned planting date. This timeline gives you enough time to make necessary adjustments and allows amendments to integrate properly with your existing soil.
You can obtain a soil test through your local cooperative extension office or use a quality home testing kit. The extension service tests are typically more comprehensive and accurate, providing detailed information about pH, nutrient levels, organic matter content, and even recommendations specific to tomato cultivation. Rutgers University’s Agricultural Experiment Station emphasizes that professional soil testing can save gardeners significant time and money by preventing over-application of unnecessary amendments.
When collecting soil samples, take multiple samples from different areas of your planting bed, mixing them together for a representative sample. Dig down 6-8 inches, which is the primary root zone for tomatoes. Remove any surface debris, stones, or mulch before sampling. If you’re testing multiple garden areas, keep samples separate and clearly labeled.
The test results will reveal your soil’s current pH level, which is crucial for nutrient availability. If your pH falls outside the optimal 6.0-6.8 range, you’ll need to adjust it accordingly. The results also show levels of nitrogen (N), phosphorus (P), and potassium (K) – the primary macronutrients – along with secondary nutrients like calcium and magnesium. Understanding these baseline levels helps you create a targeted amendment plan rather than guessing what your soil needs.
Once you know your soil’s pH, you can make organic adjustments to bring it into the optimal range for tomatoes. If your soil is too acidic (below 6.0), you’ll need to raise the pH using natural liming materials. For alkaline soils (above 6.8), organic acidifying amendments will help lower the pH to suitable levels.
For raising pH in acidic soils, I use agricultural lime (calcium carbonate) or dolomitic lime, which also adds beneficial magnesium. Apply lime at least 2-3 months before planting, as it takes time to react with the soil. The amount needed depends on your current pH and soil type – clay soils require more lime than sandy soils to achieve the same pH change. As a general guideline, apply 5-10 pounds of lime per 100 square feet to raise pH by one point, but always follow your soil test recommendations for precise amounts.
When dealing with alkaline soils, elemental sulfur is the most effective organic option for lowering pH. Like lime, sulfur needs time to work – apply it 3-4 months before planting for best results. You can also use organic materials like pine needles, peat moss, or composted oak leaves, which naturally acidify soil over time. Some gardeners have found success with improving soil quality with baking soda for minor pH adjustments, though this method requires careful application to avoid over-alkalizing.
Remember that pH adjustment is a gradual process, and dramatic changes can shock soil biology. Make incremental adjustments over multiple seasons rather than trying to achieve perfect pH in one application. Regular testing helps you monitor progress and fine-tune your approach.
Organic matter is the lifeblood of productive tomato soil, improving structure, water retention, nutrient availability, and beneficial microbial activity. I aim to maintain at least 5% organic matter in my tomato beds, which creates ideal growing conditions while supporting long-term soil health.
Compost stands as the gold standard for organic matter addition. Well-aged compost provides a balanced mix of nutrients, improves soil structure, and introduces beneficial microorganisms. Apply 2-3 inches of finished compost to your tomato bed and work it into the top 6-8 inches of soil. If you’re composting tomatoes from previous seasons, ensure they’re fully decomposed to prevent disease transmission.
Aged animal manures offer another excellent source of organic matter and nutrients. Cow, horse, chicken, and rabbit manures all work well, but they must be properly composted for at least 6 months before use. Fresh manure can burn plant roots and may contain harmful pathogens. I typically apply 1-2 inches of aged manure in fall, allowing it to integrate over winter for spring planting.
Cover crops, also known as green manures, provide a sustainable way to build organic matter while protecting soil during off-seasons. Plant nitrogen-fixing legumes like clover or vetch in fall, then till them under 3-4 weeks before planting tomatoes. This practice adds organic matter, improves soil structure, and naturally increases nitrogen levels.
Other organic materials that enhance soil include leaf mold, grass clippings (from untreated lawns), shredded bark, and coconut coir. Each material offers unique benefits – leaf mold improves water retention, grass clippings add nitrogen, and coconut coir provides excellent structure without affecting pH. Mix different organic materials to create a diverse, nutrient-rich growing medium.
Tomatoes require substantial nutrition throughout their growing season, and organic fertilization methods provide sustained nutrient release while building soil health. Understanding when and how to apply natural fertilizers ensures your plants receive adequate nutrition without the environmental impact of synthetic products.
Before planting, I incorporate a balanced organic fertilizer into the soil at a rate of 2-3 pounds per 100 square feet. Look for products with an N-P-K ratio around 4-6-3 or 5-5-5, which provides moderate nitrogen for initial growth plus phosphorus and potassium for root development and fruiting. Excellent organic options include fish meal, bone meal, blood meal, and kelp meal combinations.
Bone meal deserves special mention for tomato cultivation, as it provides both phosphorus for strong root systems and calcium to prevent blossom end rot. Mix 1-2 tablespoons into each planting hole, ensuring direct contact with developing roots. Similarly, crushed eggshells or gypsum can supplement calcium levels naturally.
For ongoing nutrition, I apply side dressings of compost or worm castings every 2-3 weeks once plants begin flowering. Worm castings are particularly valuable, offering gentle, immediately available nutrients plus beneficial microbes. Apply 1/4 cup around each plant’s base, working it lightly into the soil surface.
Liquid organic fertilizers provide quick nutrition during critical growth phases. Compost tea, fish emulsion, and seaweed extracts deliver readily available nutrients while supporting soil biology. Dilute according to package directions and apply every 2 weeks during active growth, reducing frequency as fruits ripen to enhance flavor concentration.
Proper soil structure ensures adequate drainage while maintaining moisture retention – a delicate balance crucial for tomato success. Heavy clay soils and sandy soils both present challenges that organic amendments can effectively address.
For clay soils, which tend to compact and drain poorly, I focus on adding coarse organic matter to create air pockets and improve structure. Composted bark, aged sawdust, and coarse compost work particularly well. Avoid working clay soil when wet, as this causes further compaction. Instead, wait until soil crumbles in your hand before cultivation. Adding 3-4 inches of organic matter annually gradually transforms heavy clay into productive loam.
Sandy soils present the opposite problem – they drain too quickly and don’t retain nutrients well. Here, fine-textured organic matter like well-aged compost, peat moss, or coconut coir helps bind sand particles and increase water-holding capacity. I also add biochar, which provides long-lasting structure improvement and nutrient retention in sandy conditions.
Raised beds offer an excellent solution for challenging soil conditions. Building beds 8-12 inches high allows you to create ideal soil mix regardless of native soil quality. Fill raised beds with a mixture of 40% topsoil, 40% compost, and 20% other organic matter like aged manure or leaf mold. This blend provides optimal drainage, nutrition, and structure from day one.
Consider incorporating perlite or vermiculite for container gardens or extremely heavy soils. These natural minerals improve aeration and drainage without affecting soil chemistry. Mix them at 10-15% by volume for noticeable structure improvement.
Healthy soil teems with beneficial microorganisms that support tomato growth through nutrient cycling, disease suppression, and root health enhancement. Fostering these microscopic allies through organic practices creates a living soil system that becomes more productive over time.
Mycorrhizal fungi form symbiotic relationships with tomato roots, extending the plant’s nutrient-gathering capacity by up to 1000%. These fungi trade minerals and water for plant sugars, creating a mutually beneficial partnership. Inoculate transplants with mycorrhizal powder at planting, or purchase pre-inoculated seedlings for guaranteed colonization.
Beneficial bacteria decompose organic matter, fix atmospheric nitrogen, and produce natural antibiotics that suppress soil-borne diseases. Regular compost additions maintain healthy bacterial populations, while avoiding chemical fertilizers and pesticides preserves these crucial organisms. Research from the University of Missouri Extension shows that biologically active soils require fewer inputs while producing healthier plants.
To further support soil biology, I apply compost tea bi-weekly during the growing season. This liquid concentrate of beneficial microorganisms quickly colonizes soil and plant surfaces, providing disease protection and nutrient cycling benefits. Brew compost tea using quality compost, non-chlorinated water, and adequate aeration for 24-48 hours before application.
Avoid practices that harm soil life, including excessive tilling, chemical applications, and allowing soil to completely dry out. Instead, maintain consistent moisture, use mulch to moderate soil temperature, and minimize soil disturbance to preserve the delicate microbial ecosystem.
Successful tomato soil preparation follows a strategic timeline that ensures amendments have time to integrate and conditions are optimal at planting. Here’s my proven schedule for organic soil preparation:
Fall (6 months before planting): This is when I begin the transformation process. Test your soil and apply lime or sulfur if pH adjustment is needed. Incorporate 3-4 inches of aged manure or compost into the bed. Plant cover crops like crimson clover or winter rye to protect and enrich soil over winter. This early start allows organic materials to decompose thoroughly and pH adjustments to take effect.
Early Spring (8-10 weeks before last frost): Cut down cover crops and let them decompose on the soil surface for 2 weeks, then till them under. This green manure adds significant organic matter and nutrients. Add additional compost if soil tests indicate low organic matter. Begin preparing raised beds if using them.
Mid-Spring (4-6 weeks before transplanting): Conduct a follow-up soil test to verify pH and nutrient levels. Apply balanced organic fertilizer according to test recommendations. Add bone meal, kelp meal, or other specific amendments based on your soil’s needs. Lightly till to incorporate amendments, being careful not to overwork the soil.
Two weeks before transplanting: Rake beds smooth and install drip irrigation if using. Apply 2-3 inches of organic mulch between future plant rows, leaving planting areas clear. This early mulching suppresses weeds and begins moderating soil temperature. Pre-warm soil with black plastic mulch in cooler climates.
Planting day: Dig planting holes 12-18 inches deep and wide. Mix removed soil with compost and a handful of worm castings. Add 1 tablespoon each of bone meal and kelp meal to each hole. Plant tomatoes deep, burying 2/3 of the stem to encourage strong root development.
Even experienced gardeners make soil preparation errors that limit tomato productivity. Learning from common mistakes helps ensure your preparation efforts yield maximum results.
Over-fertilizing ranks among the most frequent errors, particularly with nitrogen. Excess nitrogen promotes lush foliage at the expense of fruit production. Tomato plants with too much nitrogen grow tall and bushy but produce fewer tomatoes. Always follow soil test recommendations and err on the side of less rather than more when applying fertilizers.
Working soil when it’s too wet causes compaction that can persist for years. Wet soil forms hard clods when tilled, destroying structure and reducing drainage. Test soil moisture by squeezing a handful – it should crumble apart rather than forming a ball. If footprints remain visible in the soil, it’s too wet to work.
Ignoring soil temperature leads to poor germination and slow growth. Tomatoes planted in cold soil (below 50°F) suffer stunted growth and increased disease susceptibility. Use a soil thermometer to verify temperatures reach at least 60°F before transplanting. In cool climates, use black plastic mulch or cloches to warm soil faster.
Skipping soil tests means flying blind with amendments. Without knowing your starting point, you might add unnecessary nutrients or miss critical deficiencies. Annual testing helps track soil improvement progress and prevents nutrient imbalances that affect plant health and fruit quality.
Neglecting drainage in heavy soils creates anaerobic conditions that kill roots and promote disease. If water stands on the soil surface 30 minutes after watering, drainage needs improvement. Add organic matter, create raised beds, or install French drains to address persistent drainage issues.
Container and raised bed gardening offers unique advantages for tomato cultivation, especially when dealing with poor native soil or limited space. These methods require specific soil preparation approaches to ensure success.
For containers, create a lightweight yet nutrient-rich mix that provides excellent drainage while retaining adequate moisture. My go-to container mix combines 40% high-quality potting soil, 30% compost, 20% coconut coir or peat moss, and 10% perlite. This blend weighs less than garden soil while providing superior aeration and water retention. Add 2 tablespoons of balanced organic fertilizer per gallon of mix for initial nutrition.
Container size matters significantly for tomato success. Use minimum 5-gallon containers for determinate varieties and 10-gallon or larger for indeterminate types. Larger containers maintain more consistent moisture and temperature, reducing plant stress. Ensure containers have adequate drainage holes – waterlogged roots quickly develop root rot.
Raised beds require a different approach than containers, as they interact with underlying soil. For new raised beds, remove weeds and loosen native soil before adding your growing medium. This encourages drainage and allows roots to penetrate beyond the raised bed if needed. Fill beds with a mixture of 50% topsoil, 40% compost, and 10% aged manure or other organic matter.
Both containers and raised beds require more frequent fertilization than in-ground gardens, as nutrients leach out with regular watering. Apply diluted liquid organic fertilizer weekly once plants begin flowering. Monitor moisture levels closely, as containers and raised beds dry out faster than ground-level gardens.
Building exceptional tomato soil extends beyond single-season preparation. Implementing year-round maintenance practices creates increasingly productive soil that requires fewer inputs over time.
After tomato harvest, remove all plant debris to prevent disease carryover. Diseased plants should be disposed of rather than composted. Plant a fall cover crop immediately after clearing beds. Legumes like hairy vetch or crimson clover fix nitrogen, while grasses like annual ryegrass prevent erosion and add organic matter.
Winter provides an opportunity for soil improvement without active cultivation. Apply 2-3 inches of aged manure or compost over cover crops or bare soil. Winter freezing and thawing cycles help incorporate organic matter naturally. In mild climates, grow winter cover crops continuously for maximum benefit.
Rotate tomato planting locations annually to prevent soil-borne disease buildup and nutrient depletion. Follow tomatoes with nitrogen-fixing legumes or brassicas that help break disease cycles. This rotation principle applies even in small gardens – switch tomatoes with unrelated crops in containers or different raised bed sections.
Each spring, add fresh compost and conduct soil tests to monitor long-term trends. You’ll likely find that less fertilizer is needed as soil biology improves. This progression toward creating a self-sufficient garden reduces both costs and labor while improving harvest quality.
Despite careful preparation, soil problems sometimes emerge during the growing season. Recognizing and addressing these issues promptly prevents significant crop loss.
Nutrient deficiencies manifest through specific leaf symptoms. Nitrogen deficiency causes lower leaves to yellow while upper leaves remain green. Phosphorus deficiency produces purple-tinged leaves and stems. Potassium deficiency appears as brown leaf edges. Address deficiencies with appropriate organic amendments – fish emulsion for nitrogen, bone meal for phosphorus, and kelp meal for potassium.
Soil compaction develops from foot traffic, heavy rain, or overwatering. Symptoms include water pooling, slow drainage, and stunted plant growth. Carefully cultivate around plants with a garden fork, avoiding root damage. Apply 2-3 inches of compost mulch to prevent future compaction. For severe cases, consider double-digging beds in fall to restore structure.
Salt buildup occasionally occurs from over-fertilization or poor water quality. White crusty deposits on soil surface and leaf burn indicate excess salts. Flush containers thoroughly with clean water. For garden beds, apply gypsum to help leach salts below the root zone. Reduce fertilizer applications and test irrigation water quality if problems persist.
Soil-borne diseases like fusarium wilt and verticillium wilt persist in soil for years. Symptoms include wilting despite adequate water, yellowing leaves, and eventual plant death. Unfortunately, no cure exists once plants are infected. Focus on prevention through crop rotation, resistant varieties, and maintaining optimal soil health to support plant immunity.
When should I start preparing soil for tomatoes?
Begin soil preparation in fall for best results, about 6 months before planting. This allows time for pH adjustments and organic matter decomposition. At minimum, start 6-8 weeks before your planned transplant date to ensure adequate preparation time.
How deep should I prepare the soil for tomatoes?
Prepare soil to a depth of 12-18 inches for optimal root development. While tomato roots can extend 3-4 feet deep in ideal conditions, the majority of feeder roots occupy the top 12 inches. Deep preparation ensures good drainage and allows roots to penetrate easily during critical early growth.
Can I use fresh manure when preparing tomato soil?
Never use fresh manure directly on tomato beds. Fresh manure can burn roots, introduce pathogens, and create nitrogen imbalances. Always compost manure for at least 6 months before application. Apply fresh manure only in fall for spring planting, allowing winter to age it naturally.
What’s the best mulch for tomato plants?
Organic mulches like straw, grass clippings, or shredded leaves work excellently for tomatoes. Apply 3-4 inches after soil warms to retain moisture, suppress weeds, and moderate soil temperature. Red plastic mulch has been shown to increase yields, while black plastic warms soil in cool climates.
How often should I test my tomato garden soil?
Test soil annually for the first 3-4 years as you build soil health, then every 2-3 years once you’ve achieved optimal conditions. Always test when problems arise or when starting new garden areas. Keep records to track improvement over time.
Should I add Epsom salt to tomato soil?
Epsom salt (magnesium sulfate) only benefits tomatoes if soil tests reveal magnesium deficiency. Unnecessary application can create nutrient imbalances. If needed, apply 1 tablespoon per plant at planting and again when fruit sets. Dolomitic lime provides magnesium while also adjusting pH.
Can I reuse potting soil from last year’s tomato containers?
Yes, but refresh it properly first. Remove old roots and debris, then mix old soil 50/50 with fresh compost. Add fresh organic fertilizer and perlite to restore structure. Avoid reusing soil from diseased plants. Solar sterilization in black plastic bags during summer kills pathogens.
What causes blossom end rot, and how can soil preparation prevent it?
Blossom end rot results from calcium deficiency, often caused by inconsistent watering rather than actual calcium shortage. Ensure soil contains adequate calcium by adding bone meal or gypsum during preparation. Maintain consistent soil moisture with mulch and regular watering to enable calcium uptake.
Preparing soil for tomatoes using organic methods creates a foundation for exceptional harvests while building long-term garden sustainability. We’ve covered every aspect of soil preparation, from initial testing through seasonal maintenance, emphasizing natural approaches that work with soil biology rather than against it.
The key to success lies in starting early, understanding your soil’s unique characteristics, and patiently building organic matter and biological activity. While synthetic fertilizers might offer quick results, organic soil preparation creates lasting improvements that benefit not just this year’s tomatoes but future gardens as well.
Remember that perfect soil doesn’t happen overnight. Each season you follow these organic practices, your soil becomes more productive, requiring fewer inputs while producing healthier, more flavorful tomatoes. This investment in soil health pays dividends through increased yields, improved disease resistance, and reduced maintenance needs.
Take action now by testing your soil and beginning the amendment process. Whether you’re planning for next season or preparing beds for imminent planting, these organic soil preparation techniques will transform your tomato growing experience. Your commitment to sustainable soil management contributes to both garden success and environmental stewardship, creating a positive impact that extends far beyond your own backyard.