
There’s nothing quite like waking up in the woods to the smell of coffee brewing and anticipating that first crispy bite of toast.
After 15 years of camping trips where I’ve burned countless slices of bread, ended up with soggy excuses for toast, and resorted to eating dry crackers instead, I’ve finally cracked the code on consistently good camping toast.
The best way to make camping toast depends on your setup: use a folding camp stove toaster for convenience on propane stoves, a cast iron skillet for versatility and even results, or a pie iron for fun campfire meals that seal in toppings.
I’ve tested every method out there from coat hanger contraptions to high-end gadgets, and I’m sharing what actually works so you can skip the trial and error.
Campers typically use three main approaches to get golden-brown bread in the outdoors. Each has its place depending on your setup, group size, and patience level.
| Method | Speed | Ease of Use | Fuel Efficiency | Best For |
|---|---|---|---|---|
| Camp Stove Toaster | Fast (2-3 min) | Medium | High | Propane stove users |
| Cast Iron Skillet | Medium (3-5 min) | Easy | Medium | Any heat source |
| Pie Iron | Slow (5-8 min) | Medium | Low (more fuel) | Campfire cooking |
| Open Fire Fork | Variable | Hard | Low (wasteful) | Minimalists |

Type: Folding camp stove toaster
Capacity: 4 slices
Material: Stainless steel
Weight: 6.4 oz
Dimensions: 7.5 x 7.5 x 1.5 inches
This folding toaster is the classic solution that’s been around for decades. I’ve used one on dozens of trips and it still works perfectly despite being tossed in gear bins and exposed to campfire smoke.
The stainless steel construction resists rust better than cheaper alternatives I’ve tried that started corroding after one season.
It folds completely flat which matters more than you’d think when every inch of pack space counts. At just 6.4 ounces, weight isn’t an issue even for backpackers.
The four-slice capacity means you can feed a family without constantly reloading. I’ve found that each side takes about 90 seconds to 2 minutes with proper rotation.
You’ll need to rotate the bread 180 degrees halfway through for even browning. I’ve also learned that lowering the heat helps prevent those burnt edges with raw centers that plague first-time users.
Campers with propane or gas camp stoves who want a lightweight, dedicated solution. Perfect for car campers and backpackers who prioritize weight savings.
Campfire-only cooks and anyone who wants set-it-and-forget-it convenience. This requires active monitoring and rotation.

Type: Folding camp stove toaster
Capacity: 4 slices
Material: Stainless steel
Weight: 7.2 oz
Dimensions: 7.8 x 7.8 x 1.6 inches
This toaster follows the same folding design as Coghlan’s with very similar performance characteristics. The main difference is slightly larger dimensions and a touch more weight at 7.2 ounces versus 6.4.
In my testing, the performance difference is negligible. Both require the same rotation technique and produce similar results. The slightly larger footprint might provide a bit more stability on larger burners.
The heat-resistant handles are a nice touch that the Coghlan’s model lacks, though I’ve never found the basic metal handles problematic with proper use.
This is a solid alternative if the Coghlan’s is out of stock or priced higher. The stainless steel construction appears comparable in quality and should offer similar longevity.
Shoppers who want the same folding toaster design at a competitive price point. The added handle length makes it slightly more comfortable to use.
Anyone who already owns a Coghlan’s toaster—the differences are too minor to justify upgrading.

Type: Cast iron skillet
Size: 6.5 inches
Material: Pre-seasoned cast iron
Weight: 2.1 lbs
Made in: USA
This is the multitool of camping toast. Unlike single-purpose toasters, this skillet handles eggs, bacon, pancakes, and toast with equal capability. I’ve taken this little pan on solo trips where weight matters but versatility matters more.
The 6.5-inch size is ideal for individual portions. You can fit two slices of standard bread comfortably or one slice plus some eggs. For solo campers or couples, this size hits the sweet spot.
Lodge’s pre-seasoning means it’s ready to use immediately—no frustrating initial seasoning process required. I’ve found the factory seasoning improves with each use and each coating of oil.
The heat retention that makes cast iron famous also means your toast cooks evenly. No more burnt edges and pale centers like with camp stoves toasters.
Solo campers and couples who want one pan to do everything. Perfect for fire-only campsites where you can’t use a camp stove toaster.
Ultralight backpackers who count every ounce. At 2.1 pounds, this is significantly heavier than folding toasters.

Type: Cast iron skillet
Size: 8 inches
Material: Pre-seasoned cast iron
Weight: 2.5 lbs
Made in: USA
The 8-inch Lodge is the Goldilocks size that many campers consider essential. Large enough for full meals but still portable enough to justify packing. I reach for this size more than any other in my camping kit.
You can easily fit three slices of bread in this skillet, making breakfast for two people much more efficient than the 6.5-inch model. The extra surface area also means better heat distribution for more even toasting.
The pre-seasoned finish is the same quality as the smaller model. After three years of regular camping use, mine has developed a beautiful black patina that makes cleanup increasingly easy.
I’ve cooked everything from toast to steaks over campfires with this pan. It’s the size I recommend most often to friends getting started with cast iron camping cookware.
Campers who want one pan that can handle any meal. The 8-inch size offers the best balance between capacity and packability.
Minimalists who prefer specialized lightweight gear. This is a workhorse, not an ultralight solution.

Type: Pie iron sandwich maker
Material: Pre-seasoned cast iron
Weight: 3.2 lbs
Features: Removable handles,Single sandwich capacity
This isn’t a toaster in the traditional sense, but it might be the most enjoyable way to make toasted bread while camping. The pie iron creates sealed pockets of deliciousness that regular toasting can’t match.
I’ve made everything from basic grilled cheese to pie fillings to pizza pockets in this cooker. The cast iron construction produces excellent heat distribution and that satisfying crunch you can’t get from any other camping method.
The long steel rods with wooden handles keep you safely away from the fire. They’re removable which makes packing easier, though at 28.5 inches extended, this is still a bulky item.
Kids love using these. I’ve seen children who wouldn’t touch camp cooking get excited about making their own pocket sandwiches. It turns breakfast into an activity rather than a chore.
Families with kids and campfire enthusiasts who want more than basic toast. Perfect for those who prioritize experience over efficiency.
Backpackers and anyone cooking for large groups. The weight and single-sandwich capacity make this impractical for some users.
Pro Tip: Lower your stove’s flame more than you think necessary. I’ve burned more toast from impatience than from any other mistake. You can always add more heat but you can’t un-burn bread.
This method produces the most even results because cast iron distributes heat across the entire bread surface. I’ve found it’s also the most forgiving—slight variations in heat don’t ruin the toast like they do with camp stove toasters.
Hold bread on a long fork or stick over the fire. Rotate constantly like a marshmallow. This works but requires serious patience and produces inconsistent results. I only recommend this for novelty.
Wrap bread in foil and place on hot coals. Flip after 2 minutes. This creates more of a steamed texture than true toast, but it’s reliable in a pinch.
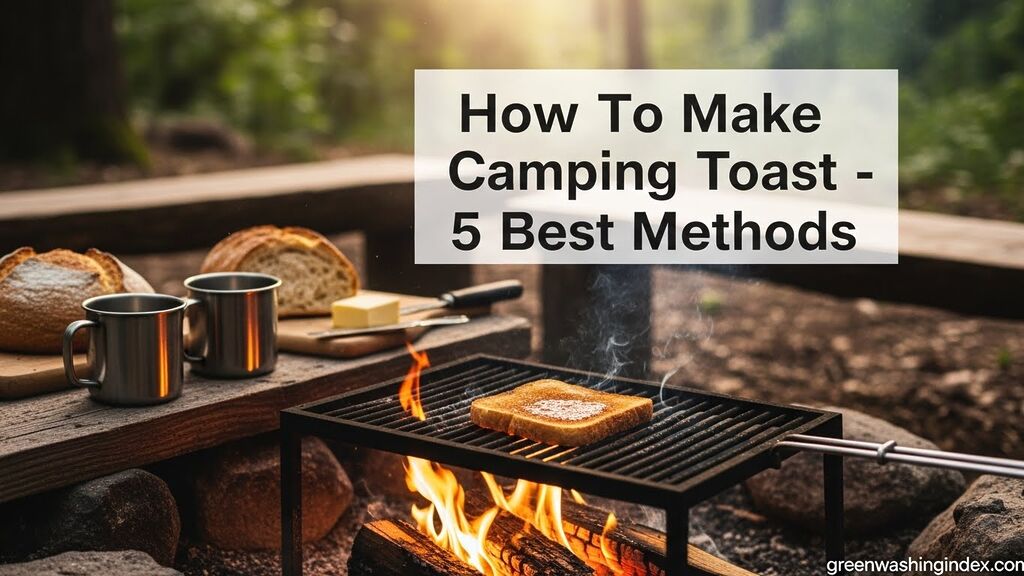
Place a wire grate over your fire and toast bread directly on it like a grill. This actually works reasonably well if you can stabilize the grate at the right height above the flames.
The environmental impact of your camping toast method matters more than most campers realize. After researching fuel efficiency and carbon footprints, here’s what every eco-conscious camper should know.
| Method | Fuel Used (per 4 slices) | Carbon Impact | Sustainability Rating |
|---|---|---|---|
| Camp Stove Toaster (Propane) | ~15 grams propane | Low-Medium | B+ |
| Cast Iron on Camp Stove | ~20 grams propane | Medium | B |
| Cast Iron on Campfire | Wood (renewable) | Low (if sustainably sourced) | A- |
| Pie Iron on Campfire | Wood (more due to time) | Low-Medium | B- |
Camp stoves burn propane efficiently, making them a good choice for quick toasting sessions. The folding toaster wins here because it captures rising heat directly around the bread with minimal waste.
Cast iron requires more fuel because the pan must heat up first. However, once hot, it retains that heat well. You’re trading initial fuel cost for sustained cooking capacity.
Campfires have the most complex equation. Wood is renewable and carbon-neutral when harvested sustainably. However, open fires are inefficient compared to stoves, and much heat escapes unused.
The most sustainable choice is equipment that lasts for years rather than replacing cheap gear every season. The Lodge cast iron skillets in this review can literally last generations—my family has pans older than I am.
Folding stainless steel toasters like the Coghlan’s and EZYoutdoor models also score well on durability. With proper care, they’ll provide many years of service unlike plastic alternatives I’ve seen crack after one season.
Sustainability Tip: The greenest camping gear is what you already own. Before buying new toasting equipment, consider what you have at home that could work. An old cast iron skillet from your kitchen might be the most eco-friendly choice of all.
After testing countless bread types in the field, I’ve learned that not all loaves are created equal for camping. Dense artisan breads take forever to toast and often burn before heating through.
Standard sandwich bread with moderate thickness works best. I’ve found that slightly stale bread actually toasts better than fresh—it holds together on the wire racks and crisps up more evenly.
The biggest mistake I see new campers make is blasting the heat. Higher flames don’t equal faster toasting—they equal burnt edges and raw centers.
Start with the lowest flame that will maintain consistent heat. You can always increase it, but you can’t fix burnt toast. I’ve learned to let my stove run for a minute before adding bread to stabilize the temperature.
Wind is the enemy of camp stove toasting. If you’re cooking in breezy conditions, create a windbreak with your body or position your stove near a natural windblock.
Cold temperatures also affect performance. In winter camping, I’ve found that toast takes significantly longer and requires more heat management than in mild weather.
Once you’ve mastered the basic toast, try these camping upgrades that have become staples on my trips:
The easiest way is using a folding camp stove toaster that holds bread upright over a burner. Alternatively, use a cast iron skillet on any heat source or a pie iron over campfire coals. Each method has advantages depending on your setup.
Cast iron skillets offer the most versatility off grid since they work on any heat source including campfires. For campfire cooking specifically, pie irons create sealed pockets of toast that won’t fall apart. A cast iron skillet over coals provides the most consistent results without electricity.
The Coghlan’s Camp Stove Toaster is the most popular choice due to its affordability and reliability at under $10. For better results, cast iron skillets from Lodge provide more even cooking and multi-purpose functionality. The best choice depends on whether you prioritize weight savings or versatility.
Stainless steel folding toasters like Coghlan’s typically last 5-10 years with proper care. Cast iron options like Lodge skillets can last generations. The main failure point for folding toasters is rust when stored damp, while cast iron’s enemy is improper maintenance leading to rust.
Yes, camp stove toasters work effectively but require technique. You must rotate the bread 180 degrees halfway through for even browning since heat rises from the burner. They work best on medium-low heat and require close monitoring to prevent burning. With practice, they produce good results in 2-3 minutes.
After years of testing and countless mornings spent experimenting with different methods, here’s my honest take on choosing the right camping toast setup.
For most campers using propane stoves, the Coghlan’s Camp Stove Toaster hits the sweet spot of price, weight, and effectiveness. It’s not perfect, but it works well once you master the rotation technique.
If you want the most versatile option, a cast iron skillet is unbeatable. The 8-inch Lodge handles toast, eggs, pancakes, and everything else you might cook. It’s heavier, but the versatility justifies the weight for most campers.
The pie iron is the specialist choice for families and campfire enthusiasts. It’s not the most efficient, but the experience of making sealed hot sandwiches over an open fire is something every camper should try at least once.
Whichever method you choose, the key is managing your heat and patience. Low and slow beats fast and burnt every time. Happy toasting.
