

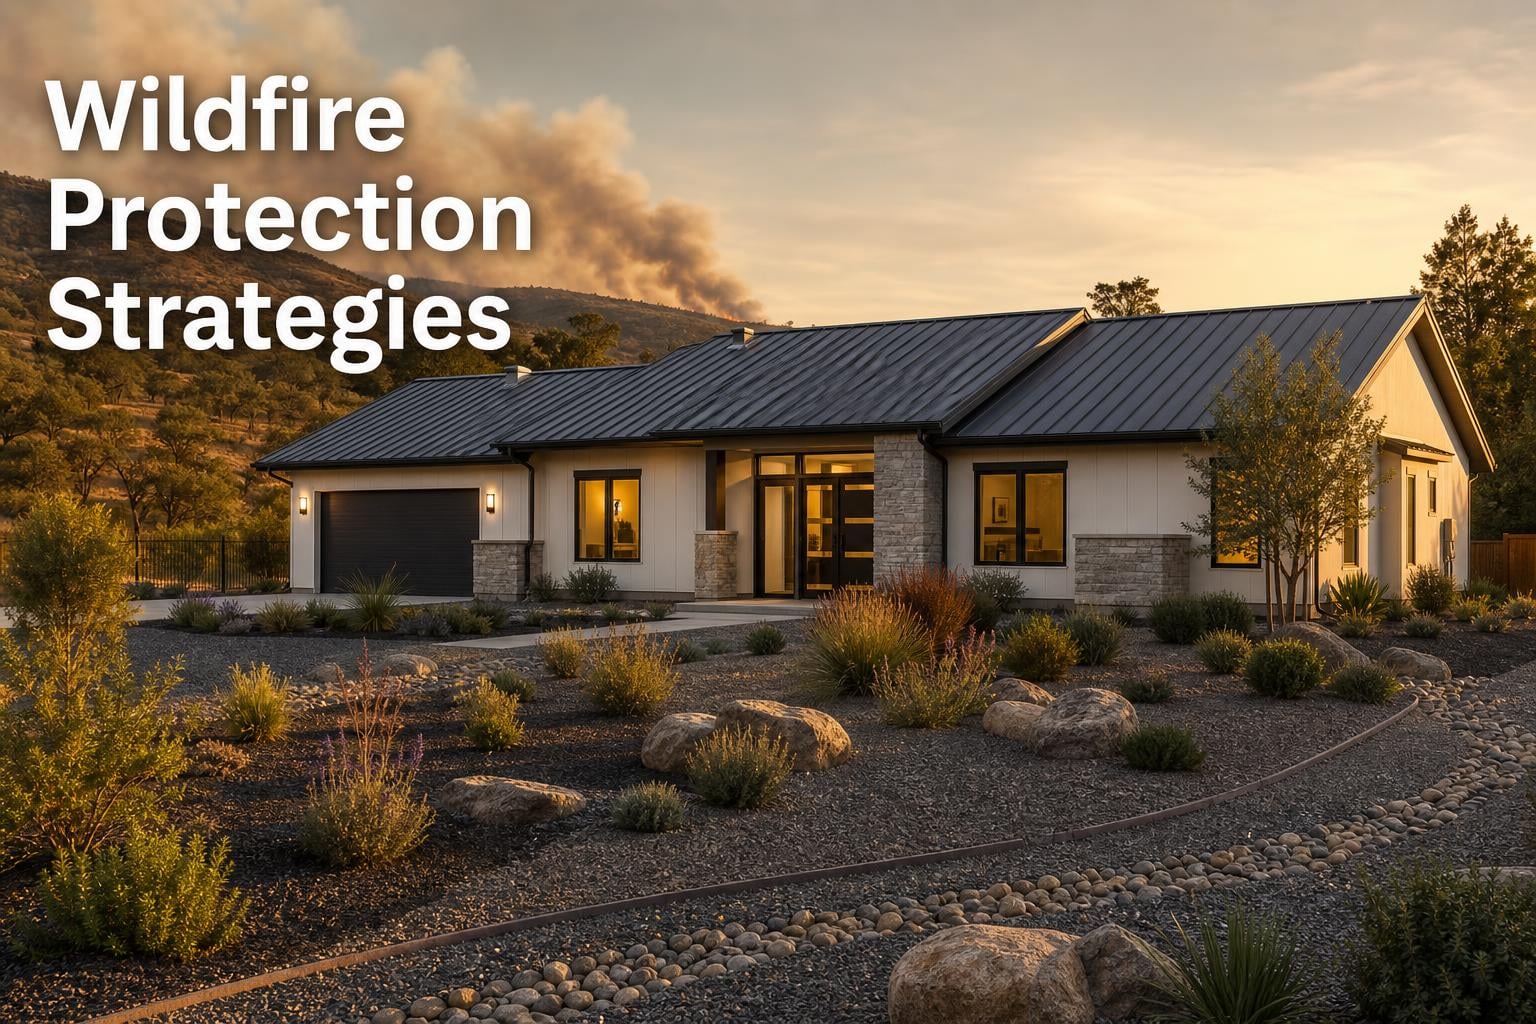
Wildfires destroyed more than 35,000 structures across the United States in the last decade alone, and the science behind those losses points to a surprising culprit. According to the Insurance Institute for Business and Home Safety (IBHS), roughly 90 percent of homes that burn during a wildfire ignite not from direct flame contact but from embers, small burning fragments that can travel a mile or more ahead of the main fire front. That single statistic reframes everything about wildfire protection. It means the work that matters most happens not at the property line where flames approach but right at the surface of the house itself, in the vents, gutters, and gaps where a single ember can take hold.
Effective wildfire protection combines two parallel strategies that fire authorities call “home hardening” and “defensible space.” Home hardening refers to modifying the building itself so that embers, radiant heat, and direct flame have nothing combustible to grab onto. Defensible space is the planned management of vegetation and combustible materials in the surrounding 100 feet so that a fire burning toward the house loses momentum before it arrives. Neither strategy works well in isolation, and fire scientists at CAL FIRE, the National Fire Protection Association (NFPA), and the Colorado State Forest Service all emphasize that the two must be implemented together.
This guide walks through every layer of wildfire protection in the order that matters most for survival. We begin with the home ignition zone framework that every major fire authority uses, then move through ember-resistant building upgrades, interior safety, smoke mitigation, technology, insurance, and post-wildfire recovery. Whether you live in a designated wildland-urban interface area or simply want to understand your exposure, the sections below provide specific, actionable steps grounded in current fire science.
What this guide covers:
Before any homeowner can take meaningful action, it helps to understand the three ways a wildfire reaches a structure. Fire researchers classify structural ignition sources into three categories: ember attack, radiant heat exposure, and direct flame contact. Ember attack is by far the most common and the most dangerous. When vegetation, outbuildings, or vehicles burn, they generate thousands of embers that wind carries far ahead of the fire front. These embers pile up in roof valleys, slip through vent openings, accumulate in gutters packed with dry leaves, and settle into cracks in decking. Given even a small amount of fine fuel to ignite, a single ember can burn down an entire home.
Radiant heat poses the second threat. When a large volume of vegetation or a neighboring structure burns within roughly 30 feet of a home, the heat radiating from that fire can be intense enough to crack windows, warp siding, and spontaneously ignite combustible materials inside wall cavities. Direct flame contact, the threat most people picture when they think of wildfires, is actually the least common cause of structural loss because well-maintained defensible space typically prevents flames from reaching the building envelope.
Understanding this hierarchy matters because it changes the priority order of every upgrade decision. A homeowner who spends thousands on a fire-resistant metal roof but leaves open, unscreened vents has addressed only part of the problem. The roof will survive ember landings, but embers will still enter the attic and ignite it from inside. Effective wildfire protection addresses every vulnerability in sequence, starting with the ones most likely to cause ignition.
It is also important to set realistic expectations. No home is truly fireproof. Fire authorities consistently use the term “fire-resistant” rather than “fireproof” because any material will eventually fail under sustained, extreme heat. The goal of wildfire protection is not to make a home invulnerable but to buy time, to make the building resistant enough that embers fail to ignite, that radiant heat does not break the windows, and that firefighters have space and opportunity to defend the property if they are able to reach it.
Also Read: 10 Best Air Purifiers For Wildfire Smoke
The first step in any wildfire protection plan is understanding the specific risk profile of your property. If you live in or near the wildland-urban interface, the zone where development meets undeveloped wildland vegetation, your risk is inherently elevated. The U.S. Forest Service estimates that roughly one-third of all U.S. homes are located in this interface zone, and that number continues to grow as development pushes into previously unsettled areas.
Risk assessment starts with local fire history. California, Colorado, Oregon, Texas, and Arizona lead the nation in both wildfire frequency and structural losses, but no state is entirely immune. The 2024 Smokehouse Creek Fire in the Texas Panhandle burned more than one million acres, demonstrating that grassland fires in flat, open country can be just as destructive as forest fires in mountainous terrain. Understanding the dominant fuel type in your area, whether it is dense timber, chaparral, grassland, or a mix, helps you anticipate how a fire would approach and what defensible space strategies will work best.
Topography plays a major role in fire behavior. Fire moves faster uphill than downhill because heat rises and preheats the fuel above it. A slope of just 20 degrees can double a fire’s rate of spread compared to flat ground. If your home sits on a hillside or at the top of a draw or canyon, fire behavior modeling suggests significantly higher exposure. In those positions, defensible space should extend farther on the uphill side, and the immediate zone around the house requires extra attention.
Seasonal patterns matter as well. Most destructive wildfires occur during the hottest, driest months of the year, but the specific timing varies by region. Southern California’s peak season runs from September through December when Santa Ana winds drive fire activity. The interior West sees the worst fires from June through September. Track local red flag warnings through the National Weather Service and sign up for emergency alerts in your county. Knowing when danger is highest allows you to complete final preparations before fire season rather than during it.
A systematic home audit identifies every point where embers could enter, flames could contact, or radiant heat could damage the structure. Fire authorities recommend starting at the roof and working downward, since embers that land on or near the roof represent the most common ignition pathway. Document findings with photographs so that you can track progress and, in some cases, submit documentation for insurance discounts or government cost-share programs.
Begin with the roof. Is it made of a Class A fire-rated material such as asphalt fiberglass shingles, metal, concrete tile, or clay tile? Wood shake roofing is the single greatest vulnerability a home can have in a wildfire zone. Embers routinely ignite wood shake roofs even when the rest of the property is well maintained. If your home has a wood shake roof, replacing it should be your first priority, regardless of its remaining lifespan.
Next, examine every vent opening. Attic vents, soffit vents, gable vents, ridge vents, and foundation vents all provide pathways for embers to enter the building envelope. Standard vent screens use 1/4-inch mesh, which is too large to stop embers. The IBHS and NFPA recommend 1/8-inch metal mesh as a minimum standard for ember resistance. Some homeowners upgrade to 1/16-inch stainless steel mesh for even finer protection, though it requires more frequent cleaning to prevent clogging. As an alternative, WUI-certified vents, named for the wildland-urban interface building code standards they meet, feature an intumescent coating that swells and seals the vent shut when exposed to high heat.
Inspect gutters and roof valleys for accumulated debris. Dry leaves, pine needles, and twigs in gutters create a ready-made ember bed directly attached to the roof edge. Install metal, noncombustible gutter guards to prevent debris accumulation and clean gutters at least twice per year. Pay particular attention to areas where tree branches overhang the roof, as these deposit debris continuously.
Walk the perimeter and check the first five feet of ground around the entire foundation. This zone is so critical that fire authorities call it the “noncombustible zone.” Anything combustible in this zone, mulch, shrubs, wood piles, wooden fencing, stored lumber, even a wooden trellis attached to the wall, provides a direct ignition path from ground-level ember accumulation to the siding and into the wall cavity. Remove all combustible materials from this zone and replace organic mulch with gravel, crushed stone, or concrete pavers.
Check that siding has at least six inches of vertical clearance from the ground. This gap prevents ground fire from creeping up the exterior wall. Examine the condition of windows and doors, noting any single-pane glass, which is far more vulnerable to cracking under radiant heat than double-pane or tempered glass. Finally, look at attached structures: decks, porches, fences, and pergolas. Combustible attachments that touch the home provide a pathway for fire to travel from landscape fuels directly into the building.
Also Read: HVAC Preventative Maintenance: Complete Energy Guide
The concept of the home ignition zone, developed by retired USDA Forest Service fire scientist Jack Cohen and now adopted by CAL FIRE, NFPA, and fire agencies nationwide, organizes defensible space into three concentric zones radiating outward from the structure. Each zone has specific management objectives and recommended actions. Together, these zones create a layered defense that reduces ember accumulation, slows fire spread, and gives firefighters room to operate.
The first five feet surrounding the foundation represent the most critical area for wildfire protection. Fire researchers have determined that this zone, where embers accumulate against the building, is where the vast majority of structural ignitions begin. The objective here is simple and absolute: remove every combustible material from this zone entirely.
Replace bark mulch, wood chips, and rubber mulch with hardscape materials such as gravel, decomposed granite, flagstone, or concrete. Relocate firewood at least 30 feet from the structure. Remove all shrubs, ornamental grasses, and small trees that are within five feet of any exterior wall, deck, or fence attached to the home. Pay special attention to the corners of the building, where embers tend to swirl and accumulate in eddies.
Combustible items stored against the house are frequently overlooked. Wooden lattice panels, stacked lumber, PVC irrigation components, plastic storage bins, brooms, door mats, and even patio furniture cushions can ignite from ember showers. Walk the perimeter and remove everything that could burn. Replace wooden gates and fence sections within five feet of the home with metal or composite alternatives. If a wooden fence must attach to the house, install a metal or masonry gate section as a fire break between the fence and the structure.
Trim any tree branches that overhang the roof or extend within ten feet of the chimney. Clear pine needles and leaf litter from the roof surface, gutters, and the ground below. This zone requires constant maintenance, not a one-time cleanup. Plan to inspect and refresh Zone 0 at least every spring and again before peak fire season.
The intermediate zone focuses on breaking up continuous fuel beds so that fire cannot carry flames from the surrounding landscape to the structure. The goal is not to eliminate all vegetation but to create horizontal and vertical spacing between plants so that fire has nowhere to travel in an unbroken line.
For trees in this zone, fire authorities recommend maintaining a minimum of 18 feet between tree canopies on flat ground. On slopes, increase that spacing proportionally, because fire intensity rises with incline. Remove the lower branches of all trees to create a vertical clearance of at least six feet between the ground and the lowest hanging branch. This practice, known as “limbing up,” prevents ground fire from climbing into the tree canopy and becoming a far more dangerous and fast-moving crown fire.
Space shrubs and small plantings so that there are clear gaps between them. A continuous hedge or border planting creates a wick that can carry fire directly to the house. Break up shrub beds with noncombustible pathways, stone walls, gravel strips, or maintained lawn areas. Keep all plants in this zone well watered and healthy, since drought-stressed vegetation contains less moisture and burns more readily.
Remove dead plant material promptly. Dead branches, dried flower stalks, accumulated leaf litter, and standing dead grass all serve as fine fuels that ignite easily and burn intensely. Mow grasses to a maximum height of four inches and remove cuttings. If you maintain a lawn, keep it irrigated through fire season so that it functions as a green fuel break rather than a source of dry fuel.
The extended zone extends defensible space to the property line or to a distance of 100 feet from the structure, whichever is greater. In this zone, the focus shifts to reducing fire intensity and slowing the rate of spread so that approaching flames lose momentum before reaching the more heavily managed inner zones.
Reduce the density of trees and shrubs so that canopies have at least 12 feet of horizontal spacing between them at this distance from the home. On steeper slopes, this spacing should increase to account for the faster rate of fire spread uphill. Remove ladder fuels, which are low-growing vegetation and lower branches that allow ground fire to climb into the canopy. Maintain a vertical clearance of at least six to ten feet between the ground and the lowest tree branch.
Properties with heavy vegetation or steep terrain may need to extend Zone 2 beyond 100 feet. Some state codes, particularly in California under Public Resource Code 4291, require 100 feet of defensible space by law. If your property line prevents achieving the full distance, coordinate with neighbors to extend the managed area across property boundaries. The fire does not respect fence lines, and neither should your mitigation work.
Consider incorporating fuel breaks such as gravel paths, driveways, stone walls, and cleared areas throughout Zone 2. These noncombustible strips interrupt fire travel and create defensible positions where firefighters can stage if they respond to your property. Remove invasive and highly flammable species such as juniper, arborvitae, Italian cypress, and eucalyptus, which contain volatile oils that make them exceptionally dangerous near structures.
No plant is truly fireproof, but some species are markedly more resistant to ignition due to high moisture content, low volatile oil levels, and open growth habits that do not accumulate dead material. When selecting plants for Zones 1 and 2, choose species that are well adapted to your climate, require minimal irrigation, and resist ignition when properly maintained.
Succulents and high-moisture plants such as aloe, ice plant (Delosperma), rockrose (Cistus), sedum, and yarrow store water in their leaves and resist ignition even under ember showers. Deciduous shrubs including bush honeysuckle, currant, cotoneaster, and hedging roses generally outperform evergreen alternatives because they shed leaves seasonally and lack the resinous oils that make evergreens so flammable.
Ground covers such as creeping thyme, woolly yarrow, and dead nettle can replace flammable lawns in low-traffic areas while maintaining green, moist ground coverage. For trees in the intermediate zone, deciduous species such as maple, ash, poplar, and birch are less flammable than conifers. Always verify plant choices with your local university extension office, as climate appropriateness varies significantly by region.
Regardless of which plants you choose, placement and maintenance matter more than species. Even a fire-resistant plant becomes a hazard if it is allowed to accumulate dead material, grows against the structure, or forms a continuous fuel bed with neighboring plants. The most effective defensible space landscapes combine appropriate species selection with rigorous spacing, pruning, and seasonal cleanup.
Also Read: Rice Composting: Ultimate Guide to Nutrient-Rich Soil
While defensible space reduces the fuel available to an approaching fire, home hardening addresses the building envelope itself. The goal is to modify every exterior surface and opening so that embers cannot find purchase, radiant heat cannot penetrate, and flame contact cannot sustain combustion. The upgrades below are organized by priority, based on fire science research from IBHS and the NFPA.
The roof is the single most important component of home hardening. Embers land on roofs more than any other surface, and once a roof ignites, the fire has direct access to the attic and structural framing. Every roofing upgrade should target a Class A fire rating, the highest standard available. Class A materials include asphalt fiberglass shingles, metal roofing (standing seam or corrugated), concrete tile, clay tile, and flat-profile fiber-cement products. Metal and tile roofs also offer the advantage of shedding debris more effectively than composition shingles, reducing the accumulation of needles and leaves that can trap embers.
Enclose open eaves, the underside of the roof overhang, with noncombustible or ignition-resistant materials such as fiber cement panels, stucco, or properly sealed tongue-and-groove boards rated for exterior fire exposure. Open eaves create a horizontal surface where embers can settle and ignite, and they expose the roof structure to direct ember entry. Boxed-in eaves eliminate this vulnerability and also improve the building’s resistance to wind-driven rain.
Install metal drip edge flashing along all roof edges and rake boards. This simple addition prevents embers from slipping under the edge of the roofing material and igniting the underlying wood decking. If you have a skylight, verify that it is dual-pane tempered glass, as standard skylights can crack under radiant heat and allow embers to enter the attic directly.
Noncombustible siding materials dramatically reduce the likelihood that ember accumulation or radiant heat will ignite the building envelope. The most effective options include fiber cement siding (HardiePlank and similar products), stucco, brick, stone veneer, and metal panels. These materials will not support combustion and provide excellent resistance to both ember attack and radiant heat.
If replacing wood siding is not feasible, focus on treating and maintaining what exists. Apply intumescent paint, which swells when exposed to high heat and forms a protective char layer that slows ignition. Ensure that all siding has at least six inches of vertical clearance from the ground to prevent ground fire from crawling up the wall. Seal all gaps and cracks in the siding where embers could enter the wall cavity, paying particular attention to the corners, utility penetrations, and the transition points between different siding materials.
Windows are among the most vulnerable components of a home during a wildfire. Radiant heat from a nearby burning structure or intense vegetation fire can crack standard single-pane glass within minutes, opening the interior to ember entry. Dual-pane windows with tempered glass on the exterior pane provide significantly better resistance. Tempered glass, identifiable by a small etched mark in the corner, withstands roughly four times the heat exposure of standard annealed glass before cracking.
If full window replacement is beyond your budget, prioritize the windows that face areas of highest fire risk, typically those on the downhill side of the property or those that face dense vegetation. Consider installing exterior shutters or metal screens that can be closed during a fire event to provide an additional layer of protection. Interior window coverings such as drapes and blinds are not effective against radiant heat and can actually ignite if the glass breaks.
Exterior doors should be solid, made of metal, fiberglass, or solid wood at least 1.75 inches thick. Hollow-core doors, particularly those with glass inserts, offer minimal fire resistance. Ensure that weatherstripping is in good condition and that the door closes flush against the frame with no gaps where embers could enter. Garage doors deserve special attention because they are the largest opening in most homes. Install a weather seal at the bottom of the garage door and consider upgrading to an insulated metal door with a fire-rated designation.
Attached decks and wooden fences act as fuses that can carry fire directly from the landscape to the house. Where possible, replace wooden decking within five feet of the home with noncombustible alternatives such as composite boards rated for fire resistance, concrete pavers, or stone. Enclose the area beneath elevated decks with fiber-cement skirting or metal mesh to prevent ember accumulation under the deck, where combustible framing and stored items often go unnoticed.
Wooden fences that attach to the home represent a well-documented ignition pathway. Fire can travel along a fence in dry conditions faster than most people expect. Replace the fence section within five feet of the home with a metal or masonry alternative, or create a noncombustible break by inserting a metal gate panel between the wooden fence and the house. Avoid storing combustible materials against fences, as these provide the fine fuel that an ember needs to begin a fire that then climbs the fence and reaches the structure.
Vents are the primary entry point for embers during a wildfire, yet they are frequently the last upgrade homeowners address. Every vent on the building, attic, soffit, gable, ridge, crawlspace, and foundation, requires ember-resistant screening. The IBHS and NFPA recommend 1/8-inch corrosion-resistant metal mesh as the minimum standard. This mesh size is small enough to block the vast majority of embers while still allowing adequate airflow for ventilation.
For homeowners seeking the highest level of vent protection, WUI-certified vents offer a significant upgrade over standard mesh. These vents, manufactured by companies such as Vulcan Vents and Brandguard Vents, incorporate an intumescent honeycomb layer that expands and seals the vent completely when exposed to temperatures above 450 degrees Fahrenheit. This passive closure system blocks both embers and flames without requiring power, sensors, or manual operation. Forum discussions among homeowners in fire-prone areas reveal that professional WUI vent installation can cost upward of $7,000 for a typical home, while a DIY stainless steel mesh roll costs roughly $37 and can be installed in an afternoon with basic tools.
The DIY approach using 1/8-inch or 1/16-inch stainless steel mesh is widely regarded as an effective, affordable first step. It does not provide the automatic closure that WUI vents offer, but it dramatically reduces ember entry compared to standard 1/4-inch screening. When installing mesh, ensure that it is securely fastened with corrosion-resistant hardware and that there are no gaps around the vent frame where embers could bypass the screen entirely.
Also Read: 5 Best Gun Safes for Home Security: Top Fireproof Options
Protecting the interior of your home during a wildfire event involves two distinct challenges: preventing embers and radiant heat from igniting materials inside the building, and protecting occupants from the dangerous levels of particulate matter that wildfire smoke introduces into indoor air. Both require preparation before fire season begins.
The same principle that applies to the exterior applies inside the home: remove combustible materials from vulnerable points. Keep windows closed during fire events, particularly those facing vegetation. If your windows are single-pane or non-tempered, do not rely on them as a barrier against radiant heat. Move furniture, drapes, and other combustible items at least three feet away from windows that face high-risk areas.
Inspect the interior side of every wall penetration, particularly around vents, electrical outlets, and plumbing fixtures in exterior walls. Seal gaps with fire-rated caulk or foam to prevent embers that enter the wall cavity from progressing into living spaces. Ensure that smoke alarms are installed in every bedroom, outside each sleeping area, and on every level of the home. Test alarms monthly and replace batteries annually.
Keep a fire extinguisher rated for Class A, B, and C fires on each floor of the home, and ensure that all household members know how to use them. Inspect electrical cords and appliances for damage, as electrical faults are a common source of ignition that can coincide with power fluctuations during wildfire events. If you have a fireplace, ensure that the damper closes properly and consider installing a chimney cap with spark arrestor mesh to prevent embers from entering through the flue.
Wildfire smoke contains dangerous levels of fine particulate matter, specifically PM2.5, particles smaller than 2.5 micrometers that penetrate deep into the lungs and enter the bloodstream. During major wildfire events, outdoor PM2.5 levels can exceed 200 micrograms per cubic meter, more than five times the EPA’s 24-hour health standard. Without active mitigation, a significant portion of that pollution migrates indoors through ventilation systems, open doors, and building envelope infiltration.
The most effective indoor air quality strategy combines three elements: source reduction, filtration, and air cleaning. Source reduction means keeping all windows and doors closed, setting HVAC systems to recirculate rather than draw in outside air, and sealing obvious gaps around windows and doors with weatherstripping. Filtration involves upgrading your HVAC system’s filter to a minimum MERV 13 rating, which captures the majority of fine particulate matter. Check the filter frequently during smoke events, as it will load up faster than normal and require replacement.
A dedicated air purifier with a True HEPA filter provides an additional layer of protection, particularly in bedrooms where people spend extended periods. HEPA filters capture 99.97 percent of particles 0.3 micrometers in size, making them highly effective against wildfire smoke. For comprehensive recommendations, see our guide to the best air purifiers for wildfire smoke. Homeowners in wildfire-prone areas may also want to explore air purifiers made in the USA for wildfire areas, as several domestic manufacturers design specifically for smoke and volatile organic compound filtration.
Understanding the difference between air purifiers and air conditioners is important, as air conditioning units alone do not filter fine particles effectively. During severe smoke events, run a HEPA air purifier continuously in occupied rooms and create a clean air space, a designated room where you can retreat if outdoor air quality reaches hazardous levels. Keep a supply of N95 or P100 respirator masks for every household member, as these are the only mask types that effectively filter fine particulate matter when you must go outdoors.
Wildfires can escalate with terrifying speed. Residents who survived the 2020 Bobcat Fire and other fast-moving events consistently report having only minutes to grab essentials and evacuate. A written, practiced evacuation plan is not optional for households in fire-prone areas. It is a survival tool.
Identify at least two evacuation routes from your home and two from your neighborhood, in case one is blocked by fire or emergency traffic. Designate a meeting point outside the fire hazard zone where household members will gather if separated. Share your plan with a contact outside the area who can serve as a communication hub if local cell service is disrupted.
Assemble a go-bag for each household member containing at least a three-day supply of water and non-perishable food, a first aid kit, prescription medications, a change of clothes, a flashlight with extra batteries, a battery-powered or hand-crank radio, copies of important documents in a waterproof container, cash in small denominations, and a map of the local area. Include pet supplies, children’s items, and any specialized medical equipment. Store go-bags near the primary exit so they can be grabbed immediately. Review and refresh the contents at least once per year, replacing expired food, medications, and batteries.
Store irreplaceable documents, backup hard drives, and valuables in a fireproof safe rated for at least one hour at 1700 degrees Fahrenheit. For recommendations, see our guide to fireproof safes for home security. Take a video walkthrough of your home and belongings annually and store it in cloud storage, as this documentation is invaluable for insurance claims if the home is damaged or destroyed.
Also Read: Composting Onions: Unearthing the Truth and Squashing Myths
Home hardening and defensible space are passive defenses, they work continuously without input or power. Technology adds an active layer of protection that can detect threats, alert occupants, and in some cases directly suppress or repel fire. The products below represent the current state of wildfire defense technology as of 2026, though no system can guarantee complete protection.
Early detection is the foundation of any active defense system. Smart smoke detectors that connect to home Wi-Fi networks and send alerts to your phone provide real-time notification whether you are at home or away. These detectors can differentiate between cooking smoke and genuine fire signatures, reducing false alarms while ensuring that actual threats trigger immediate alerts.
Thermal imaging cameras, once limited to professional firefighting equipment, are now available in affordable consumer versions. These cameras can be mounted on the exterior of the home and connected to a smartphone app, allowing you to monitor the temperature of surrounding vegetation and structures in real time. If a fire approaches, thermal imaging reveals hot spots and ember ignitions that may not be visible to the naked eye, particularly at night or through smoke.
Sign up for local emergency notification systems, which typically deliver alerts via text message, phone call, or mobile app. CAL FIRE, ReadyforWildfire.org, and county-level emergency management agencies all offer free alert services. Consider a NOAA weather radio with SAME (Specific Area Message Encoding) technology as a backup, since cellular networks can fail during major fire events due to power outages and infrastructure damage.
Fire-blocking gels, sometimes called fire-retardant gels or residential Class A foam, are water-based products that can be applied to the exterior of a home just before a wildfire arrives. The gel adheres to vertical surfaces, forms a thick wet coating, and continues to retain moisture for hours, preventing embers and radiant heat from igniting the building envelope. The most widely known consumer product, Barricade Fire Blocking Gel, is applied using a standard garden hose and a specialized applicator wand.
Gel systems are intended for last-resort application when an evacuation order is imminent. The gel must be applied while there is still time and safe access to the property, and it is only effective for a limited period, typically several hours to a full day depending on temperature, wind, and humidity. After the threat passes, the gel must be washed off to prevent staining and residue buildup. Homeowners who have used gel systems during actual fire events report varying results, and fire authorities caution that gel should supplement, not replace, proper home hardening and defensible space.
Perimeter sprinkler systems represent a more substantial investment in active fire defense. These systems consist of sprinkler heads mounted on the roof and around the property perimeter, connected to a dedicated water supply and pump. When activated, the sprinklers wet the roof, walls, and surrounding vegetation, raising the moisture content of fuels and creating a humid microclimate that suppresses ember ignition.
Commercial systems from companies like Frontline Wildfire Defense integrate with mobile apps, allowing remote activation and providing real-time system status. These systems require a reliable water source, which may mean installing a dedicated water tank for properties without adequate municipal supply. Off-grid homeowners on Reddit and in survival forums have shared successful DIY sprinkler systems built from standard irrigation components and powered by generators or solar-charged battery banks. These systems can be effective, but they depend entirely on having adequate water, power, and time to activate before the fire arrives.
The key limitation of all active defense systems is that they require power, water, and human decision-making at a moment when all three may be in short supply. Power lines often fail during wildfires as poles burn, and municipal water pressure can drop to unsafe levels as demand spikes and supply infrastructure is damaged. For this reason, fire authorities emphasize that active systems should always be understood as a supplement to passive defenses, never a replacement.
Also Read: Pineapple Composting: Your Ultimate Guide to Doing it Right!
The wildfire insurance market has changed dramatically in recent years. In California, major carriers have paused or restricted new policies in high-risk areas, and the state’s FAIR Plan, the insurer of last resort, has seen enrollment surge. Similar challenges have emerged in Colorado, Oregon, and Washington. Homeowners in designated wildland-urban interface areas should not assume that coverage will remain available or affordable without active mitigation.
Review your policy annually and verify that it explicitly covers wildfire damage, including fire following a lightning strike or other natural ignition source. Confirm that your dwelling coverage limit reflects current reconstruction costs, which have risen sharply with inflation and labor shortages. Many homeowners are underinsured because their limits were set years ago and have not kept pace with rebuilding expenses. If your home is destroyed, you need enough coverage to rebuild to current code, which may require code upgrade endorsements that add 10 to 50 percent to the dwelling limit.
Check that your policy includes additional living expenses (ALE) coverage, which pays for temporary housing, food, and other costs if you are displaced from your home. Standard ALE limits cover one to two years of displacement, but in areas where widespread destruction slows rebuilding, even that may be insufficient. Also verify coverage for detached structures (sheds, garages, fences), personal property, and landscaping, as these are often capped at percentages of the dwelling limit that may not reflect actual replacement costs.
Ask your insurance provider about wildfire mitigation discounts. Many carriers now offer premium reductions of 5 to 20 percent for documented home hardening and defensible space improvements. Requirements vary by carrier but typically include a Class A roof, ember-resistant vents, defensible space compliance, and in some cases a professional wildfire risk assessment. Documenting your upgrades with photos, receipts, and inspection reports strengthens your case for discounts and streamlines claims if a loss occurs.
Several government programs provide financial assistance for wildfire mitigation. Colorado offers a state income tax credit covering 50 percent of wildfire mitigation costs on residential properties, up to $2,500 per year, through 2027. Eligible expenses include defensible space creation, tree thinning, and structural upgrades that meet Colorado State Forest Service guidelines.
FEMA’s Building Resilient Infrastructure and Communities (BRIC) program provides pre-disaster mitigation funding to states and local governments, some of which flows to homeowner cost-share programs for defensible space and home hardening. The USDA Forest Service and state forestry agencies administer similar cost-share programs that can cover 50 percent or more of mitigation costs on private land. Contact your state forestry division or local fire department to ask about available programs, as funding availability and eligibility criteria change annually.
CAL FIRE offers free defensible space inspections for California residents and maintains a list of recommended professional mitigation contractors. The California Wildfire Mitigation Program provides direct financial assistance to income-eligible homeowners in high-risk communities for home hardening retrofits. Similar programs exist in Oregon, Washington, and other western states, though funding levels and application processes vary.
Forum discussions consistently reveal that cost is the single greatest barrier to home hardening. Professional WUI vent installation can exceed $7,000, and a full metal roof replacement can cost $15,000 or more. Most homeowners cannot address every vulnerability at once. The priority sequence below reflects the guidance of fire scientists and is organized by impact per dollar spent.
First priority is establishing the noncombustible Zone 0 around the foundation. This is the cheapest and highest-impact action any homeowner can take. Removing mulch, relocating firewood, clearing gutters, and raking debris costs nothing but time and eliminates the most common ignition pathway. Second is upgrading vent screening to 1/8-inch metal mesh, which costs roughly $37 for a stainless steel roll and can be completed in a weekend.
Third is removing highly flammable landscaping within 30 feet of the home, particularly juniper, arborvitae, and Italian cypress. Fourth is addressing the roof, either by replacing wood shake with a Class A material or, at minimum, installing ember-resistant ridge vents and metal drip edge flashing. Windows, siding, and active defense systems should follow, as these represent larger investments that are most justified in the highest-risk locations.
Individual home hardening matters, but fire science research consistently shows that community-level action multiplies the protection of every individual property. If your neighbor’s house ignites, the radiant heat and flying embers from that structure dramatically increase the risk to surrounding homes, regardless of how well-prepared they are. This is why the NFPA’s Firewise USA program and Community Wildfire Protection Plans (CWPPs) have become central pillars of wildfire resilience in the wildland-urban interface.
Firewise USA is a national recognition program that helps neighborhoods organize, assess their collective risk, and implement a multi-year mitigation plan. To earn and maintain Firewise recognition, a community must form a board, complete a wildfire risk assessment with a local fire professional, develop an action plan, and invest a minimum of $2 per resident annually in mitigation activities, which can include volunteer labor at a standardized value. Over 2,000 communities across 43 states participate in the program, and studies have shown that Firewise-designated communities experience significantly lower loss rates during wildfires.
A Community Wildfire Protection Plan is a more formal document, typically developed at the county or municipal level, that identifies wildfire risks across a broader area and prioritizes mitigation projects. CWPPs are required for communities seeking federal funding for hazardous fuel reduction on adjacent public lands. They also inform local building codes, evacuation planning, and emergency response strategies. If your community has a CWPP, review it to understand how your property fits into the broader risk picture and what collaborative mitigation opportunities exist.
Building relationships with neighbors around wildfire preparedness creates practical benefits beyond statistical risk reduction. Coordinated defensible space projects that span property boundaries are more effective than isolated efforts. Shared evacuation routes and communication plans ensure that no household is overlooked during an emergency. And in the aftermath of a fire, organized communities recover faster, with better access to shared resources and stronger advocacy for government assistance.
The danger does not end when the flames pass. Returning to a property after a wildfire involves significant hazards that require careful assessment. Local authorities will declare an area safe for reentry only after structural assessments, utility inspections, and hazard removal are complete. Never attempt to return before this official clearance is issued.
Before entering any structure, verify that utilities have been inspected and cleared. Gas lines, electrical systems, and water supplies can all be compromised by fire and the heavy equipment used in suppression. Smell for gas before entering and leave immediately if you detect any odor. Watch for smoldering hot spots in the attic, wall cavities, and around the foundation, which can flare up hours or days after the main fire has passed.
Wear personal protective equipment during cleanup, including N95 masks, heavy gloves, eye protection, and sturdy boots. Ash and debris from burned structures contain hazardous materials including asbestos, lead, arsenic, and fine particulate matter that can cause serious health problems if inhaled or ingested. Do not begin debris removal without consulting local health department guidance, as some materials require professional hazardous waste handling.
Document all damage thoroughly with photographs and video before beginning any cleanup. Contact your insurance company immediately to initiate the claims process and request an advance payment for additional living expenses if you are displaced. Keep receipts for all expenses related to the fire, including temporary housing, food, clothing, and mitigation supplies. The claims process can be lengthy and adversarial, and detailed documentation is your strongest tool for ensuring fair compensation.
Be aware of the emotional toll of post-wildfire recovery. The trauma of evacuation, property loss, and displacement can affect every member of the household, including children and pets. The Red Cross, local mental health agencies, and community organizations offer counseling and support services specifically designed for disaster survivors. Reaching out for help early is not a sign of weakness but a practical step toward recovery.
The home ignition zone is the area within 100 feet of a structure where homeowners can modify conditions to reduce wildfire ignition risk. Fire scientists divide it into three zones: the immediate noncombustible zone (0 to 5 feet), the intermediate fuel reduction zone (5 to 30 feet), and the extended management zone (30 to 100 feet). Research shows that 90 percent of homes ignite from embers, making the immediate zone around the foundation the most critical area to address.
The 30/30/30 rule refers to conditions of extreme fire danger: temperatures above 30 degrees Celsius (86 degrees Fahrenheit), relative humidity below 30 percent, and sustained winds above 30 kilometers per hour (approximately 19 mph). When all three conditions are present simultaneously, fire behavior becomes unpredictable and extreme, and authorities typically issue red flag warnings urging maximum caution and preparedness.
Fire authorities agree that the best wildfire defense is a combination of home hardening and defensible space. The highest-impact actions are establishing a noncombustible 5-foot zone around the foundation, installing a Class A fire-rated roof, upgrading vents to 1/8-inch metal mesh or WUI-certified vents, and maintaining 100 feet of managed defensible space. Active systems like sprinklers and fire-blocking gel provide additional protection but should supplement, not replace, these passive defenses.
The five most effective wildfire protection actions are: 1) Remove all combustible materials from the 5-foot zone around your foundation, 2) Install a Class A fire-rated roof and clean gutters regularly, 3) Upgrade all vents to ember-resistant mesh or WUI-certified vents, 4) Create and maintain 100 feet of defensible space with proper tree spacing and fuel reduction, and 5) Install dual-pane tempered glass windows and noncombustible siding.
Yes. Testing by the Insurance Institute for Business and Home Safety (IBHS) has demonstrated that WUI-certified vents with intumescent coatings effectively block both embers and flames during simulated wildfire conditions. Standard 1/8-inch metal mesh is also effective at blocking most embers, though it does not provide the automatic closure that WUI vents offer. Homeowners who installed ember-resistant vent screening report that it is one of the most cost-effective upgrades available, with DIY mesh installation costing under $50.
No trees should be planted within the 5-foot noncombustible zone around the home. Within 30 feet of the structure, tree canopies should have at least 18 feet of horizontal spacing between them on flat ground (more on slopes), and the lowest branches should be at least 6 feet above the ground. Beyond 30 feet, canopy spacing of 12 feet is recommended, with vertical clearance increasing on slopes to account for faster fire spread uphill.
Most standard homeowners policies cover fire damage including wildfires, but coverage availability and affordability have declined in high-risk areas. In California, major carriers have restricted new policies, driving homeowners to the state FAIR Plan. Always verify that your policy explicitly includes wildfire coverage, confirm that dwelling limits reflect current rebuilding costs, and ask about mitigation discounts for documented home hardening improvements.
Wildfire protection is not a single project but a layered, ongoing process that combines defensible space management, structural hardening, interior preparedness, smoke mitigation, and community coordination. The science is clear: 90 percent of homes ignite from embers, which means the work that saves structures happens at the building envelope and in the five feet immediately surrounding it. Every homeowner can take meaningful action starting today, beginning with the zero-cost steps of clearing the noncombustible zone and screening vents, and building progressively toward comprehensive home hardening.
The most important mindset shift is understanding that no home is truly fireproof and that wildfire protection is about managing probability, not achieving certainty. Every upgrade you make, every foot of defensible space you maintain, every vent you screen, and every ember pathway you close reduces the chance that a single burning fragment will find enough fuel to take hold. Implemented consistently across a community, these individual actions have been shown to save entire neighborhoods. Fire respects no boundary, but preparation respects no limit. Start where you are, prioritize by impact, and build your defenses layer by layer.
For ongoing indoor air quality protection during wildfire season, review our guides to the best air purifiers for wildfire smoke and proper HVAC maintenance and filter upgrades. Wildfire protection and smoke mitigation are two halves of the same resilience strategy, and together they give your household the best chance of weathering whatever the next fire season brings.
