


Water crossings are one of the most intimidating aspects of backcountry hiking. I remember my first major river crossing on a solo backpacking trip in the Sierra Nevada. The water was colder than I expected, the current felt stronger than it looked from shore, and I spent fifteen minutes pacing back and forth before committing.
That experience taught me what I now share with others: proper technique and the right gear make all the difference between an adventure and an ordeal. After crossing hundreds of streams over the past decade, I’ve learned that hiking in water is a skill that combines assessment, technique, and equipment. The National Park Service reports that water crossings account for numerous hiking incidents annually, yet most are preventable with proper preparation.
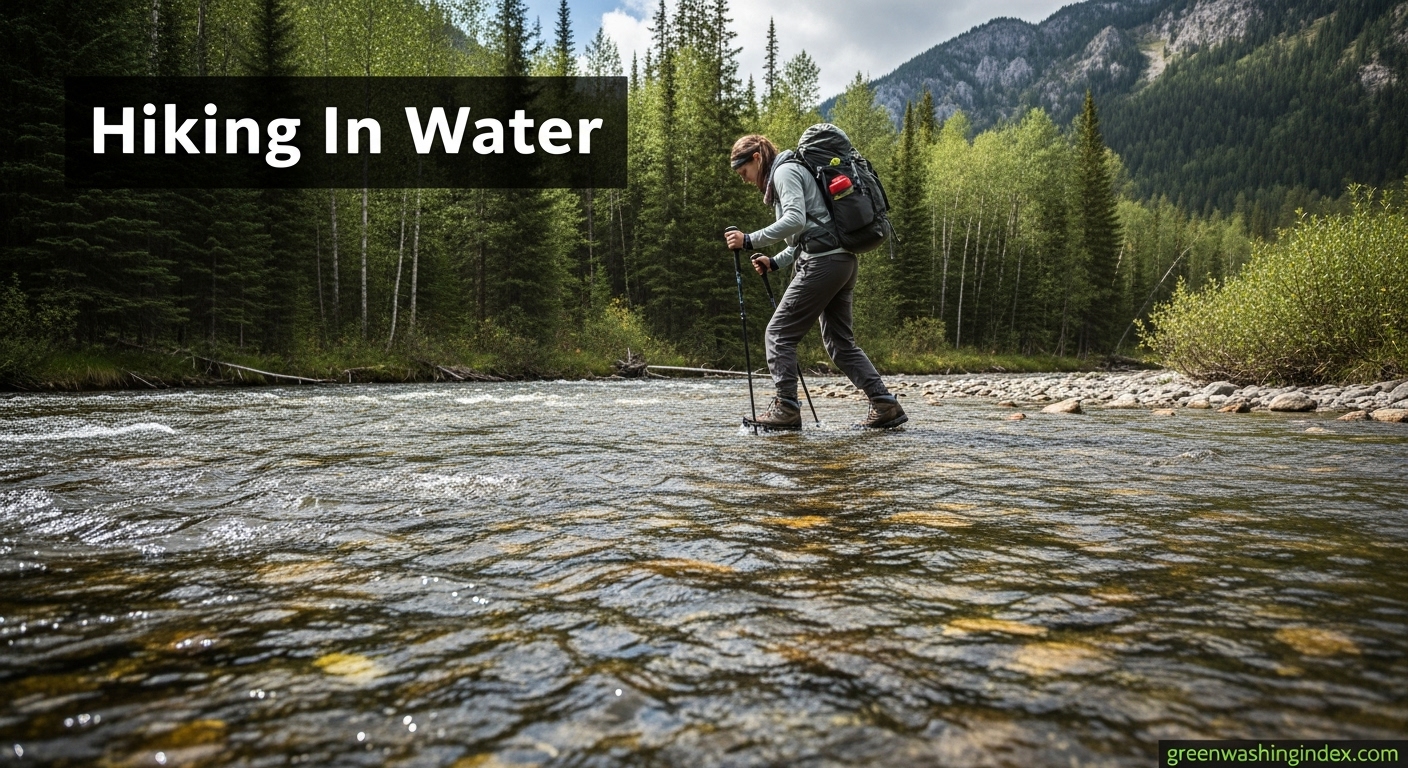
To hike through water safely, you need to assess conditions thoroughly, use proven crossing techniques with three points of contact, face upstream, and move slowly and deliberately while keeping your backpack unbuckled. The right gear—water shoes, trekking poles, waterproof socks, and dry bags—provides essential protection and stability.
This guide covers everything you need to know about safe water crossings, from reading river conditions to choosing the right equipment for your adventures.
The right equipment makes water crossings significantly safer and more comfortable. Based on my testing and research, these three items stand out for different needs and budgets.
This table compares all the essential gear for safe water crossings. Each item serves a specific purpose in keeping you stable, dry, and safe during river crossings.
| Product | Features | Price |
|---|---|---|
 |
|
Check Latest Price |
| SEEKWAY Aqua Shoes |
|
Check Latest Price |
 |
|
Check Latest Price |
 |
|
Check Latest Price |
 |
|
Check Latest Price |
| WRAP ME Waterproof Socks |
|
Check Latest Price |
 |
|
Check Latest Price |
 |
|
Check Latest Price |
Before you ever step into the water, you need to assess whether crossing is safe. To assess river crossing safety, evaluate water depth, current speed, water temperature, downstream hazards, and your group’s experience level. The Appalachian Trail Conservancy recommends turning back if water is above your thigh, current is swift enough to knock you off balance, or if you cannot see the bottom clearly.
I use a simple checklist before every crossing. First, scout upstream and downstream for hazards—waterfalls, strainers, rapids—that would make a fall catastrophic. Then throw a stick into the current to gauge speed. If it moves faster than a walking pace, the current is too strong for safe crossing.
Critical Safety Rule: If in doubt, turn back. The trail will still be there tomorrow. No river crossing is worth risking your life.
Water depth above your knees significantly increases risk and should trigger extra caution. Water above your waist should only be attempted by experienced hikers with proper equipment. I once turned back at a Sierra Nevada crossing where the water was mid-thigh but deceptively powerful. Later that day, I watched a group struggle through the same spot, with one hiker getting swept downstream before catching a branch.
For most hikers, knee-deep water is the practical limit. Beyond that, the force of the current multiplies exponentially, and footing becomes unpredictable. Look for wider, shallower sections even if it means hiking further upstream or downstream.
To cross a river while hiking solo, face upstream, use two trekking poles for three points of contact, unbuckle your backpack, shuffle sideways while maintaining contact with the bottom, and move slowly and deliberately. This method has served me well through countless crossings in the Cascades, Rockies, and Appalachians.
The Pacific Crest Trail Association emphasizes facing upstream and maintaining three points of contact. This technique has saved me multiple times when I’ve slipped on submerged rocks—my poles caught me instantly, preventing what could have been dangerous falls.
Trekking poles transform water crossings from nerve-wracking ordeals into manageable challenges. To use trekking poles for water crossings, plant both poles upstream of your body, lean on them for stability, and use them to probe depth and check for solid footing before each step.
I learned this lesson the hard way on an early hike when I attempted a crossing with a single pole. I felt unstable and had to abandon the attempt halfway through. On my next trip with two poles, the same crossing felt completely different—I had confidence and stability.
Group crossings provide additional safety through mutual support. Groups can cross rivers safely using the parallel method (side-by-side with linked arms), the wedge formation (strongest hiker upstream breaking current), or the line method (single file across the safest route).
The parallel formation works well for moderate crossings. Group members link arms or grasp each other’s packs, creating a stable wall that presents less surface area to the current. The strongest hikers position themselves on the upstream ends to break the force of the water.
For more challenging crossings, I’ve used the wedge formation successfully. Our group’s strongest member positioned slightly upstream, breaking the current for those behind. This method distributes the force and provides support if anyone slips.

Type: Quick-dry aqua socks
Design: Barefoot feel
Closure: Slip-on
Sole: Non-slip rubber
SIMARI water shoes offer an affordable entry point for hikers who need reliable footwear for water crossings without breaking the bank. The quick-dry synthetic material sheds water rapidly, so you’re not squelching along the trail after crossing.
The barefoot design gives you excellent ground feel, helping you detect stable footing on slippery rocks. I recommend these for hikers who primarily deal with shallow crossings and want something they can pack away easily when not in use.
Product data unavailable.
SEEKWAY positions itself as a step up from budget options with improved durability and construction. These quick-dry shoes handle repeated crossings better than cheaper alternatives, making them ideal for trails with multiple stream crossings.
The barefoot feel remains, giving you good ground contact for stability on uneven river bottoms. I find these particularly useful for alpine lake approaches where you’re transitioning between trail, shore, and shallow water.

Type: Hybrid hiking/water shoe
Design: Aero Sport build
Features: Premium construction
Use: Serious water hiking
Merrell’s All Out Blaze represents the premium end of water crossing footwear. This hybrid design bridges the gap between hiking boots and water shoes, giving you support for the trail and performance in the water.
The Aero Sport construction provides serious traction on slippery surfaces—crucial when you’re dealing with moss-covered river rocks. I’ve used these on extended backpacking trips where water crossings are frequent but you still need proper hiking support on dry trail.

Material: 7075 Aluminum
Lock: Flip-lock system
Grip: Cork and EVA
Quantity: 2-piece set
KINGGEAR trekking poles provide essential stability for water crossings at a budget-friendly price point. The 7075 aluminum construction offers reliable strength without the weight penalty of cheaper materials.
The flip-lock system is superior to twist locks for water crossings—you can adjust length quickly even with wet hands, and the mechanism is less prone to freezing in cold conditions. Cork and EVA grips provide comfort even when your hands are wet from the river.

Material: 7075 Aluminum
Design: Collapsible
Grip: EVA foam
Features: Lightweight construction
TrailBuddy trekking poles strike an excellent balance between performance and value. The collapsible design makes them easy to attach to your pack when not in use, while the 7075 aluminum construction provides reliable strength for demanding crossings.
The EVA foam grips remain comfortable even during extended use, and the lightweight design reduces arm fatigue during long days with multiple crossings. I recommend these for hikers who want serious performance without paying premium prices.
Product data unavailable.
WRAP ME waterproof socks offer an affordable solution for keeping your feet dry during shallow crossings. The merino wool blend provides natural temperature regulation, preventing your feet from overheating while maintaining warmth in cool conditions.
The breathable cushion construction makes these comfortable enough for all-day wear on the trail. I find them particularly useful for early season hiking when you’re dealing with snowmelt crossings but still want breathable footwear on dry trail.

Type: Extreme cold weather socks
Lining: Merino wool
Features: Breathable membrane
Use: Winter hiking
SEALSKINZ Stanfield socks represent the premium end of waterproof sock technology, designed specifically for extreme conditions. The merino wool lining provides exceptional warmth even in freezing water, making these ideal for early spring or late autumn crossings.
The breathable membrane releases heat and moisture while preventing water entry, creating a comfortable microclimate for your feet. I recommend these for serious backcountry travelers who encounter glacial streams or high-elevation snowmelt crossings.

Type: Roll top dry bag
Features: Phone case included
Sizes: Multiple options
Construction: Durable waterproof
The Earth Pak dry bag is essential equipment for keeping your gear dry during water crossings. The roll-top closure creates a reliable waterproof seal that I’ve trusted through everything from shallow stream crossings to accidental immersions.
The included waterproof phone case is a thoughtful addition that protects one of your most critical pieces of equipment. I recommend lining your pack with a trash compactor bag for primary protection and using this dry bag for electronics and other sensitive items that demand extra security.
As hikers, we have a responsibility to minimize our impact on fragile aquatic ecosystems. When crossing streams, avoid trampling sensitive riparian vegetation along banks. Enter and exit the water at already-established points where possible.
Responsible hiking practices extend to water crossings. Avoid crossing through spawning beds during fish spawning seasons, and never introduce soap or other substances into streams. Our Leave No Trace principles guide emphasizes protecting aquatic habitats.
Eco Tip: Cross streams at single, well-chosen points rather than creating multiple paths that damage stream banks and increase sedimentation in sensitive waterways.
Knowing when not to cross is as important as knowing how to cross. Turn back immediately if water is above your thighs, current is swift enough to knock you over, water is extremely cold, you cannot see the bottom, or downstream hazards exist.
I’ve made the go/no-go decision many times, and turning back has never ruined my trip. The trail will be there another day, the water level will drop, or I’ll find an alternative route. Each time I’ve chosen caution over confidence, I’ve been grateful later.
Andrew Skurka, renowned backpacking expert, emphasizes that good judgment is the most important outdoor skill. If you’re uncertain about a crossing, that uncertainty itself is reason to reconsider.
To cross a river while hiking safely, face upstream, use two trekking poles for three points of contact, unbuckle your backpack, shuffle sideways while maintaining contact with the bottom, and move slowly and deliberately. Always assess conditions first and never cross if water is above your thighs or current is swift.
Always cross with footwear rather than barefoot. Barefoot crossings expose you to cuts from hidden rocks, sharp objects, and slippery surfaces without traction. Water shoes or hiking boots with good grip provide essential protection and stability. Forum consensus strongly favors footwear for safety.
If you fall in, immediately swim aggressively to shore—do not try to stand. Your pack creates buoyancy, so keep it unless it pulls you under. Once on shore, assess for injuries and get warm immediately. Hypothermia can set in quickly even in summer. Always have an escape route planned before crossing.
Water above your knees significantly increases risk. Water above your thighs should only be attempted by experienced hikers with proper equipment. Above waist depth is generally too dangerous for most hikers. Remember that current force increases exponentially with depth, and deeper water makes footing unpredictable.
Plant both poles upstream of your body to create two additional points of contact. Lean on them for stability and use them to probe depth and check for solid footing before each step. Maintain three points of contact at all times—two poles and one foot, or two feet and one pole.
Essential water crossing gear includes water shoes or appropriate footwear, two trekking poles for stability, waterproof socks for cold conditions, and a dry bag for protecting sensitive gear. Proper equipment transforms water crossings from dangerous ordeals into manageable challenges.
Water crossings don’t have to be the scary parts of your hiking adventures. With proper assessment, proven techniques, and the right gear, you can approach streams and rivers with confidence rather than dread.
Invest in quality waterproof hiking boots or water shoes, carry trekking poles on every backcountry trip, and practice your technique on easy crossings before attempting challenging ones. Your comfort in the backcountry depends on preparation and judgment—develop both before you need them.
The mountains will always be there. Sometimes the best decision is to turn back, wait for conditions to improve, or find an alternative route. That’s not failure—that’s wisdom.