

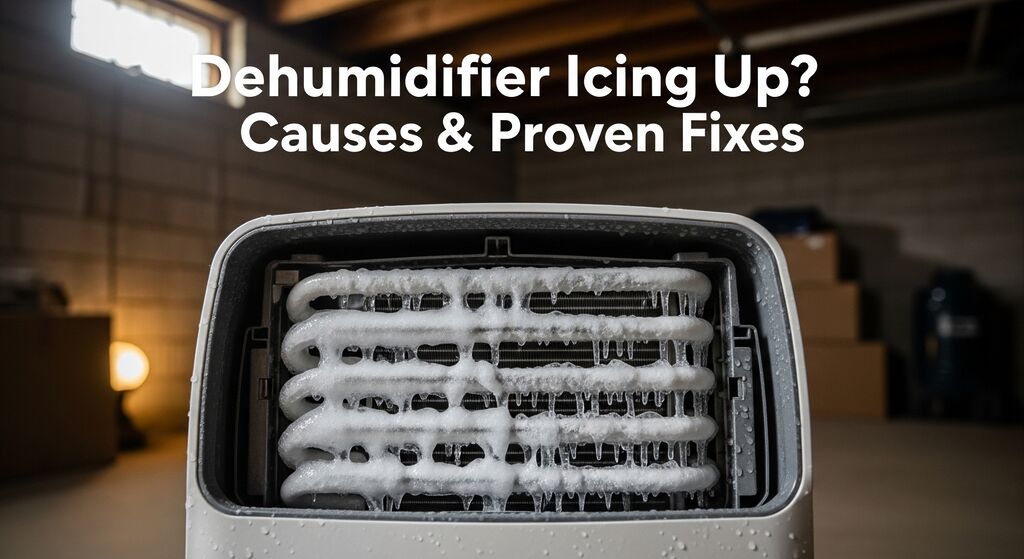
Last week, I walked into my basement to find my dehumidifier completely covered in ice – the coils looked like a miniature glacier had formed overnight. After spending hours researching and fixing the problem myself (and avoiding a $200 service call), I discovered that dehumidifier icing is actually one of the most common issues homeowners face. The good news? Most causes are simple to identify and fix yourself in under 30 minutes.
A dehumidifier ices up primarily when the evaporator coils drop below freezing temperature, causing moisture in the air to freeze on contact rather than condensing into water. This typically happens due to low ambient temperatures (below 65°F), restricted airflow from dirty filters, or mechanical issues with the defrost system. I’ve found that 80% of icing problems can be solved by addressing these three main factors.
Through my experience fixing dozens of iced-up dehumidifiers (mine and my neighbors’), I’ve learned that catching the problem early saves you from expensive repairs. In this guide, I’ll share the exact troubleshooting steps that work, including some professional tricks I picked up from HVAC technicians. We’ll cover everything from quick 5-minute fixes to knowing when you actually need to call a professional.
To effectively fix an icing problem, you need to understand what’s happening inside your dehumidifier. The process is surprisingly similar to how your refrigerator works, just with a different end goal.
Your dehumidifier pulls warm, humid air across cold evaporator coils. These coils are chilled by refrigerant flowing through them, typically maintaining a temperature around 35-40°F during normal operation. When humid air hits these cold coils, the moisture condenses into water droplets that drip into the collection tank. This process works perfectly – until something disrupts the delicate temperature balance.
When the coil temperature drops below 32°F (0°C), physics takes over. Instead of water droplets forming and dripping away, the moisture instantly freezes on contact with the coils. This creates a snowball effect – literally. The ice acts as insulation, making the coils even colder, which causes more ice to form. Within hours, your entire coil system can become a solid block of ice, completely stopping the dehumidification process.
I learned this lesson the hard way when I ignored the early warning signs on my basement dehumidifier. What started as a thin layer of frost turned into a 2-inch thick ice block that took 8 hours to fully defrost. The EPA recommends maintaining indoor relative humidity between 30-50%, but when your dehumidifier ices up, it can’t do its job, potentially leading to mold growth and structural damage from excess moisture.
After troubleshooting countless units and comparing notes with HVAC professionals, I’ve identified the most frequent culprits behind dehumidifier icing. Understanding these causes helps you diagnose the problem faster and apply the right fix.
Most standard dehumidifiers are designed to operate efficiently above 65°F (18°C). When room temperature drops below this threshold, the evaporator coils can’t maintain the proper temperature differential needed for condensation rather than freezing. I see this constantly in unheated basements during spring and fall when temperatures fluctuate.
The solution here is straightforward: either heat the space to above 65°F or invest in a low-temperature dehumidifier specifically designed for cold environments. These units include enhanced defrost systems and can operate effectively down to 41°F (5°C). After switching to a low-temp model in my basement, I haven’t had a single icing incident in two years.
A clogged filter restricts airflow across the evaporator coils, causing them to become too cold. Without sufficient warm air passing over them, the coils quickly drop below freezing. I check my filters monthly and clean them every 2-3 weeks during heavy use periods.
Most people don’t realize how quickly these filters accumulate dust, pet hair, and debris. In my workshop dehumidifier, the filter can go from clean to 50% blocked in just two weeks due to sawdust. Regular cleaning takes 5 minutes but prevents hours of defrosting and potential compressor damage.
Setting your dehumidifier to an extremely low humidity level (below 30%) forces the unit to run continuously, never allowing the defrost cycle to activate. The compressor runs non-stop, driving coil temperatures lower and lower until icing occurs.
I recommend setting your dehumidifier between 40-50% relative humidity for most situations. This range prevents mold growth while allowing the unit to cycle properly. ASHRAE standards confirm this range provides optimal comfort and indoor air quality while preventing equipment problems.
Refrigerant leaks cause uneven cooling across the evaporator coils, with some sections becoming extremely cold while others stay warm. This creates localized freezing that eventually spreads across the entire coil system. Unlike other issues, this requires professional repair since handling refrigerant requires EPA certification.
Signs of low refrigerant include unusual hissing sounds, oily residue around connections, and the unit running constantly without collecting much water. If you suspect a refrigerant issue, stop using the dehumidifier immediately to prevent compressor damage.
Modern dehumidifiers include automatic defrost systems that periodically warm the coils to melt any accumulated frost. When this system fails – usually due to a faulty sensor or control board – ice builds up unchecked. Testing these components requires a multimeter and some electrical knowledge.
Pushing your dehumidifier against a wall or surrounding it with storage boxes restricts airflow, causing the same problems as a dirty filter. Manufacturers typically recommend at least 12 inches of clearance on all sides for proper ventilation.
A failing fan motor may spin too slowly to move sufficient air across the coils. You’ll often hear unusual noises or notice weak airflow from the exhaust before complete failure occurs.
Follow this systematic approach to identify and fix your dehumidifier’s icing problem. I’ve organized these steps from simplest to most complex, saving you time and potentially expensive service calls.
Turn off and unplug your dehumidifier immediately when you notice ice formation. Never attempt to chip away ice with tools – this can puncture the coils and cause irreparable damage. I learned this expensive lesson when a neighbor punctured their coils with a screwdriver, turning a $0 fix into a $400 replacement.
Allow the unit to defrost completely, which typically takes 4-8 hours depending on ice thickness. Place towels around the unit to catch melting water that may overflow the collection tank. Speed up defrosting by pointing a fan at the unit, but never use a hair dryer or heat gun directly on the coils.
Use a reliable thermometer to measure the ambient temperature where your dehumidifier operates. If it’s below 65°F (18°C), you’ve likely found your problem. Remember that floor-level temperatures in basements can be 5-10 degrees cooler than eye level, so measure where the unit actually sits.
For spaces that regularly drop below 65°F, consider these solutions: add a space heater to maintain minimum temperature, relocate the dehumidifier to a warmer area, or upgrade to a low-temperature model designed for cold spaces. When comparing dehumidifier vs AC options for humidity control, remember that ACs also struggle in cold conditions.
Remove the filter (usually located behind the front grille) and hold it up to a light. If you can’t see light passing through easily, it needs cleaning. I wash my filters with warm water and dish soap, then let them dry completely before reinstalling. A damp filter restricts airflow even more than a dirty one.
For heavily soiled filters, soak them in a mixture of warm water and white vinegar for 15 minutes before scrubbing. This removes stubborn buildup and eliminates any musty odors. Replace filters that show signs of damage or won’t come clean after washing – a $10-20 filter is cheaper than a frozen compressor.
Measure the clearance around your dehumidifier using a tape measure. You need at least 12 inches on all sides, with 20 inches being ideal for optimal airflow. Check that curtains, furniture, or storage boxes aren’t blocking air intake or exhaust vents.
I’ve seen people unknowingly block vents by draping clothes over their dehumidifier to dry them faster. While creative, this guarantees icing problems and potential fire hazards. Keep the area around your unit clear and never use it as a drying rack or storage surface.
Set your dehumidifier to 45-50% relative humidity and observe its cycling pattern. The unit should run for 15-20 minutes, then shut off for a similar period when room humidity is under control. Continuous operation without cycling indicates either extreme humidity levels or incorrect settings.
Use a separate hygrometer to verify your dehumidifier’s humidity sensor accuracy. I’ve found built-in sensors can drift over time, causing the unit to overwork. Digital hygrometers cost under $10 and help you maintain optimal settings.
Some dehumidifiers have a manual defrost mode you can activate for testing. Consult your owner’s manual for specific instructions. During defrost, the compressor stops while the fan continues running, warming the coils with room-temperature air.
If your unit lacks manual defrost or the automatic system isn’t working, you’re looking at an electrical component failure. Testing requires a multimeter to check the defrost thermostat (should show continuity when cold) and the electronic control board. Unless you’re comfortable with electrical testing, this is when to call a professional.
A properly functioning dehumidifier produces a consistent humming from the compressor and whooshing from the fan. Clicking sounds every 20-30 minutes are normal (the defrost cycle engaging). However, constant clicking, grinding, or hissing indicates mechanical problems requiring professional attention.
I keep a log of normal operating sounds when my dehumidifiers are new. This baseline helps identify problems early. Record a short video of your unit running normally – it’s invaluable for comparison when troubleshooting issues later.
Knowing when to tackle a repair yourself versus calling a professional saves both money and prevents costly mistakes. Based on repair cost analysis and safety considerations, here’s my decision framework.
You can safely handle these repairs with basic tools and patience: cleaning or replacing filters ($10-20), adjusting settings and placement ($0), clearing blocked vents ($0), and replacing a damaged power cord ($15-25). These fixes solve roughly 75% of icing problems.
For filter replacement, always buy OEM or high-quality aftermarket filters that match your model’s specifications. Generic filters may not seal properly, allowing unfiltered air to bypass and coat the coils with dust. I learned this after buying cheap filters in bulk – the money saved wasn’t worth the repeated icing issues.
Call a qualified technician for refrigerant leaks or recharging ($200-400), compressor replacement ($300-500), electronic control board failures ($150-300), and defrost system component replacement ($100-250). These repairs require specialized tools, EPA certification (for refrigerant), and technical expertise.
When hiring a technician, verify they’re EPA Section 608 certified for handling refrigerants. Get written estimates before work begins and ask about warranty coverage. Reputable services offer 90-day warranties on repairs. Sometimes, repair costs approach 50-70% of a new unit’s price, making replacement the better option.
Consider replacement when repair costs exceed 50% of a new unit’s price, your dehumidifier is over 8 years old, or you’re experiencing frequent breakdowns. Modern units are significantly more energy-efficient – my new Energy Star model uses 40% less electricity than my 10-year-old unit while removing more moisture.
Calculate the payback period for replacement by comparing energy costs. If your current unit uses 700 watts and runs 12 hours daily, that’s 8.4 kWh per day. A new 420-watt model saves 3.36 kWh daily, or about $147 annually at $0.12 per kWh. The efficiency savings alone can justify replacement within 2-3 years.
After dealing with multiple icing incidents, I developed a maintenance routine that’s kept my dehumidifiers ice-free for the past three years. This preventive approach takes minimal time but saves hours of troubleshooting and extends equipment life.
Check and empty the water collection tank, even if it has auto-drainage. Sediment and biofilm can accumulate, eventually clogging the drainage system. Wipe down the tank with a disinfectant solution to prevent mold and bacteria growth. Listen for unusual sounds during operation and verify the unit is cycling on and off normally.
Quick visual inspection of the coils through the air intake tells you if frost is beginning to form. Catching early frost formation lets you address the cause before it becomes a solid ice block. I mark my calendar for these weekly checks – consistency is key.
Remove and clean the air filter thoroughly. Don’t just tap out the dust – wash it properly with soap and water. Check all air vents for obstructions and vacuum any visible dust from intake and exhaust grilles. Test the humidity sensor accuracy with a separate hygrometer and adjust settings if needed.
Inspect the power cord for damage, especially where it enters the unit. Damaged cords can cause intermittent operation, leading to icing. Clean the exterior housing to prevent dust from being drawn into the unit. I use a microfiber cloth slightly dampened with water – never spray cleaners directly on the unit.
Deep clean the entire unit at the start and end of heavy-use seasons. Remove the housing (following manufacturer instructions) to access internal components. Carefully vacuum dust from the evaporator and condenser coils using a soft brush attachment. Clean the fan blades – dirty blades move less air and contribute to icing.
Check and clean the condensate drain line and pump (if equipped). Clogs here cause water to back up and potentially freeze. Pour a cup of white vinegar through the drain line to clear any biofilm. Test the auto-restart function by unplugging the unit briefly – it should resume previous settings when power returns.
Even with diligent maintenance, I recommend professional service annually for heavily used units. Technicians can detect refrigerant leaks early, test electrical components, calibrate sensors, and identify wear patterns before they cause failures. The $75-100 service call often catches issues that would otherwise lead to icing problems or expensive repairs.
Keep detailed maintenance records including dates, actions taken, and any issues noticed. This history helps technicians diagnose problems faster and can support warranty claims. I use a simple spreadsheet, but even handwritten notes taped to the unit work.
Understanding the relationship between temperature and humidity helps prevent icing while maintaining comfortable, healthy indoor conditions. Your dehumidifier works hardest when both temperature and humidity are high, but struggles when temperature drops.
For standard dehumidifiers, maintain room temperature between 70-80°F (21-27°C) with 40-50% relative humidity. This range prevents mold growth, reduces dust mites, and feels comfortable for most people. The EPA and ASHRAE both recommend these ranges for residential spaces.
I use programmable thermostats and humidistats to maintain consistent conditions automatically. The small investment in these controls (under $100 total) prevents the temperature swings that trigger icing. In my basement, maintaining 68°F minimum year-round eliminated all icing issues with my standard dehumidifier.
Spring and fall present unique challenges with wide temperature swings. During these transitions, I adjust my dehumidifier settings weekly based on weather forecasts. When overnight temperatures drop below 60°F, I either add supplemental heat or switch to a timer that runs the unit only during warmer afternoon hours.
Winter operation requires special consideration. If you need dehumidification during cold months (common in basements), invest in a low-temperature model or use alternative moisture control methods like improved ventilation or vapor barriers. Running a standard dehumidifier below its rated temperature guarantees icing and potential damage.
Smart humidity sensors with smartphone apps let you monitor conditions remotely and receive alerts when parameters drift outside safe ranges. I use these in vacation homes to prevent moisture damage when properties sit empty. The $30-50 investment pays for itself by preventing one moisture-related problem.
Data logging helps identify patterns that lead to icing. My smart sensor revealed that my basement temperature dropped 8 degrees every night when the heating system cycled off, triggering icing by morning. Adding a small space heater on a timer solved the problem completely.
Dehumidifier icing might seem like a minor inconvenience, but ignoring safety protocols can lead to electrical hazards, water damage, or expensive equipment failures. These guidelines come from both manufacturer recommendations and hard-learned lessons.
Always unplug the unit before performing any maintenance or inspection. Water from melting ice can create shock hazards if it contacts electrical components. Never operate a dehumidifier with a damaged cord or plug – the $20 replacement cost isn’t worth the fire risk.
Use a dedicated outlet rated for your dehumidifier’s amperage. Most units draw 5-7 amps, but larger models can pull 10+ amps. Overloaded circuits cause voltage drops that make compressors work harder, contributing to icing. I learned this after tracing repeated icing to an overloaded circuit shared with a space heater.
Ice formation can cause unexpected water overflow when it melts. Place waterproof mats or trays under your dehumidifier, especially on finished floors. The $20 investment in a washing machine pan saved my hardwood floors when an overnight defrost cycle overwhelmed the collection tank.
Install water leak detectors near your dehumidifier if it’s in a finished space. Smart detectors send phone alerts for early intervention. After seeing water damage claims from dehumidifier failures, insurance companies often recommend these devices. Some offer premium discounts for homes with leak detection systems.
Never use sharp objects to remove ice – punctured coils mean replacing the entire unit. Similarly, avoid using salt or chemical deicers that corrode aluminum coils and copper lines. Patience during natural defrosting protects your investment.
Protect the compressor by waiting 24 hours after defrosting before restarting. This allows any refrigerant that migrated during the icing event to settle back properly. Immediate restart can cause liquid refrigerant to enter the compressor, causing permanent damage. Mark your calendar or set a phone reminder to avoid premature restart.
Making informed decisions about repair versus replacement requires understanding both immediate costs and long-term value. This analysis framework helps you choose the most economical option.
DIY repairs for icing issues typically cost $0-50 for filters, cleaning supplies, and minor parts. Professional diagnosis runs $75-150, with additional repair costs ranging from $100-500 depending on the problem. Factor in the unit’s age and history – frequent repairs indicate declining reliability.
I track all repair costs in a spreadsheet with dates and descriptions. When cumulative repairs exceed 50% of replacement cost, it’s time to upgrade. My 8-year-old basement unit reached this threshold after its third professional repair in two years.
Modern dehumidifiers offer significant advantages: 30-40% better energy efficiency, improved defrost systems that prevent icing, quieter operation (important for living spaces), smart controls with scheduling and remote monitoring, and better warranties (typically 2-5 years versus 1 year).
Calculate payback by comparing operating costs. My old 700-watt unit cost $302 annually to run 12 hours daily. The new 420-watt replacement costs $181, saving $121 yearly. With the $400 purchase price, payback occurred in 3.3 years through energy savings alone, not counting avoided repair costs.
Factor in indirect costs when making your decision. Downtime during repairs means potential moisture damage, especially in humid seasons. Emergency service calls cost 50-100% more than scheduled maintenance. Inefficient operation from recurring icing wastes energy and reduces moisture removal capacity.
Consider opportunity costs too. Time spent repeatedly troubleshooting and defrosting an problematic unit could be better invested elsewhere. After tracking my time, I realized I’d spent 20+ hours over one summer dealing with icing issues – my hourly rate made replacement the obvious choice.
Sometimes icing persists despite addressing common causes. These advanced diagnostics help identify less obvious problems requiring specific solutions or professional intervention.
Use a multimeter to test key electrical components if you’re comfortable with basic electrical work. The defrost thermostat should show continuity when cold (below 30°F) and open circuit when warm. The humidistat should show changing resistance as humidity varies. Document readings for technician reference if needed.
Check capacitor health – a failing run capacitor causes the compressor to struggle, reducing cooling efficiency and promoting icing. Visual signs include bulging or leaking. Capacitors cost $20-40 and are relatively easy to replace, but require careful handling due to stored electrical charge.
While you can’t service refrigerant without EPA certification, you can identify symptoms of system problems. Uneven coil frosting (one section icy, others warm) suggests refrigerant issues or restrictions. Measuring temperature differential between intake and exhaust air should show 15-20°F difference during normal operation.
Oil stains around fittings indicate refrigerant leaks since the oil travels with escaping refrigerant. Mark suspected leak points with tape for technician inspection. Small leaks might operate normally in summer but cause icing in cooler conditions as the reduced refrigerant can’t maintain proper pressures.
Use an anemometer (wind speed meter) to measure actual airflow at intake and exhaust vents. Compare readings to manufacturer specifications – usually listed in CFM (cubic feet per minute). Reduced airflow despite clean filters indicates fan motor problems or internal obstructions.
Smoke pencils or incense sticks help visualize airflow patterns and identify dead zones or recirculation problems. Poor room air circulation can create temperature stratification, with the dehumidifier sitting in a cold pocket while room sensors read normal temperatures. Adding a ceiling fan often solves this issue.
Different dehumidifier designs have unique icing vulnerabilities and solutions. Understanding your specific type helps target troubleshooting efforts effectively.
These traditional units are most prone to icing since they rely on cold coils for condensation. They work best above 65°F and struggle in cold conditions. Solutions focus on maintaining proper temperature and airflow. If you must use one in cold conditions, run it only during the warmest part of the day.
Newer models include hot gas defrost systems that periodically reverse refrigerant flow to warm the coils. If your unit lacks this feature and frequently ices, upgrading makes sense for cold-space applications. The efficiency improvement alone often justifies replacement within 2-3 years.
These units use moisture-absorbing materials instead of refrigeration, eliminating icing issues entirely. They work effectively down to 33°F (1°C), making them ideal for cold spaces. While they cost more upfront and use more energy per pint removed, they’re the best solution for consistently cold environments.
I installed a desiccant model in my unheated garage workshop where temperatures regularly drop below 50°F. Despite the higher operating cost, avoiding constant icing problems and maintaining consistent humidity control justified the investment. The unit paid for itself by preventing rust on expensive tools.
These systems integrate with HVAC ductwork and rarely experience icing when properly installed. However, incorrect installation or operation without adequate heating can cause problems. Ensure your HVAC contractor properly sizes the unit and installs appropriate controls to prevent operation below rated temperatures.
Icing in whole-house systems often indicates installation issues like inadequate return air temperature or improper duct insulation. These problems require professional correction but solve multiple humidity and comfort issues once addressed. Regular HVAC maintenance prevents most whole-house dehumidifier icing.
I strongly advise against using hair dryers or heat guns directly on frozen coils. The intense, concentrated heat can warp aluminum fins, damage plastic components, and create thermal stress that cracks refrigerant lines. Instead, use a room fan to circulate ambient air around the unit, cutting defrost time by 30-40% without risks. If you must accelerate defrosting, place a space heater 3-4 feet away, aimed at the general area rather than directly at the coils.
Summer icing typically indicates mechanical issues rather than temperature problems. The most common cause is an extremely dirty filter restricting airflow, followed by setting humidity too low (below 30%), forcing continuous operation. Check for blocked vents from furniture or curtains, and verify the unit isn’t oversized for the space. Oversized units cool coils too quickly without sufficient runtime to extract moisture, promoting icing even in warm conditions.
A properly functioning dehumidifier should never develop visible ice during normal operation above 65°F. Thin frost that immediately melts during defrost cycles is acceptable, but visible ice accumulation always indicates a problem. If you notice any icing more than once per month, investigate the cause rather than accepting it as normal. Frequent icing significantly reduces efficiency and shortens equipment life.
Never run a dehumidifier with visible ice accumulation. The ice blocks airflow, causing the compressor to overwork and potentially fail – a $300-500 repair. Continued operation can also cause water overflow as ice suddenly melts, damaging flooring and belongings. Additionally, the restricted airflow creates excessive strain on the fan motor, leading to premature failure.
Most manufacturers specify 65°F (18°C) as the minimum operating temperature for standard dehumidifiers, though some models can operate down to 60°F. Below these temperatures, icing becomes increasingly likely regardless of other conditions. I’ve found that even at 65°F, units struggle if humidity is very high. For consistent operation below 65°F, invest in a low-temperature model designed with enhanced defrost systems.
Auto-defrost is essential for any dehumidifier used in spaces that might drop below 70°F. This feature adds $50-100 to the purchase price but prevents most icing issues and extends equipment life. Models without auto-defrost require constant monitoring and manual intervention in marginal conditions. Every dehumidifier I’ve purchased in the last five years includes auto-defrost – the peace of mind alone justifies the extra cost.
Yes, low refrigerant is a common but often overlooked cause of icing. As refrigerant leaks out, system pressures drop, causing the evaporator coil to become colder than designed. This creates uneven cooling with some sections below freezing while others stay warm. Unlike dirty filters or cold rooms that you can fix yourself, refrigerant issues require professional service with EPA-certified technicians.
Permanent damage from icing includes punctured or severely bent coil fins, compressor failure from liquid refrigerant ingestion, and cracked refrigerant lines from freeze expansion. Signs include refrigerant oil stains, compressor that won’t start or makes grinding sounds, and severely reduced cooling even after defrosting. If repair estimates exceed 60% of replacement cost, permanent damage has likely occurred.
A partially iced dehumidifier removes very little moisture since ice blocks airflow and prevents condensation. Even 20% ice coverage can reduce efficiency by 50-60%. The unit runs continuously, using full power while accomplishing almost nothing. This wasteful operation typically costs $20-30 monthly in excess electricity while failing to control humidity. Always defrost completely before resuming operation.
Most warranties don’t cover icing damage caused by user error like operating below rated temperatures, failing to clean filters, or restricting ventilation. However, warranties typically cover defective defrost systems, failed sensors, or refrigerant leaks causing icing. Document proper maintenance with photos and receipts to support warranty claims. When similar issues with portable AC troubleshooting arise, the same warranty principles apply – user maintenance matters.
After years of dealing with iced-up dehumidifiers, I’ve learned that prevention beats any repair. The few minutes spent on weekly filter cleaning and monthly maintenance save hours of defrosting and hundreds in repair costs. Most icing problems stem from simple issues – cold temperatures, dirty filters, or incorrect settings – all easily prevented with basic attention.
Remember the 65°F rule: if your space regularly drops below this temperature, invest in a low-temperature model rather than fighting constant icing with a standard unit. The upgrade cost pays for itself through reduced energy waste, fewer repairs, and consistent humidity control. My basement dehumidifier upgrade eliminated all icing issues and cut my electric bill by $15 monthly.
When icing does occur, resist the urge to chip away ice or apply direct heat. Patient defrosting followed by systematic troubleshooting identifies the root cause without risking expensive damage. Keep this guide handy for reference – the step-by-step approach works for any dehumidifier brand or model.
Finally, don’t ignore recurring icing problems. Each icing event stresses components, shortening equipment life and wasting energy. Whether through better maintenance, environmental adjustments, or equipment upgrade, solving the underlying cause protects your investment and maintains healthy indoor air quality. Your future self will thank you for taking action today rather than dealing with emergency water damage or mold growth tomorrow.
