

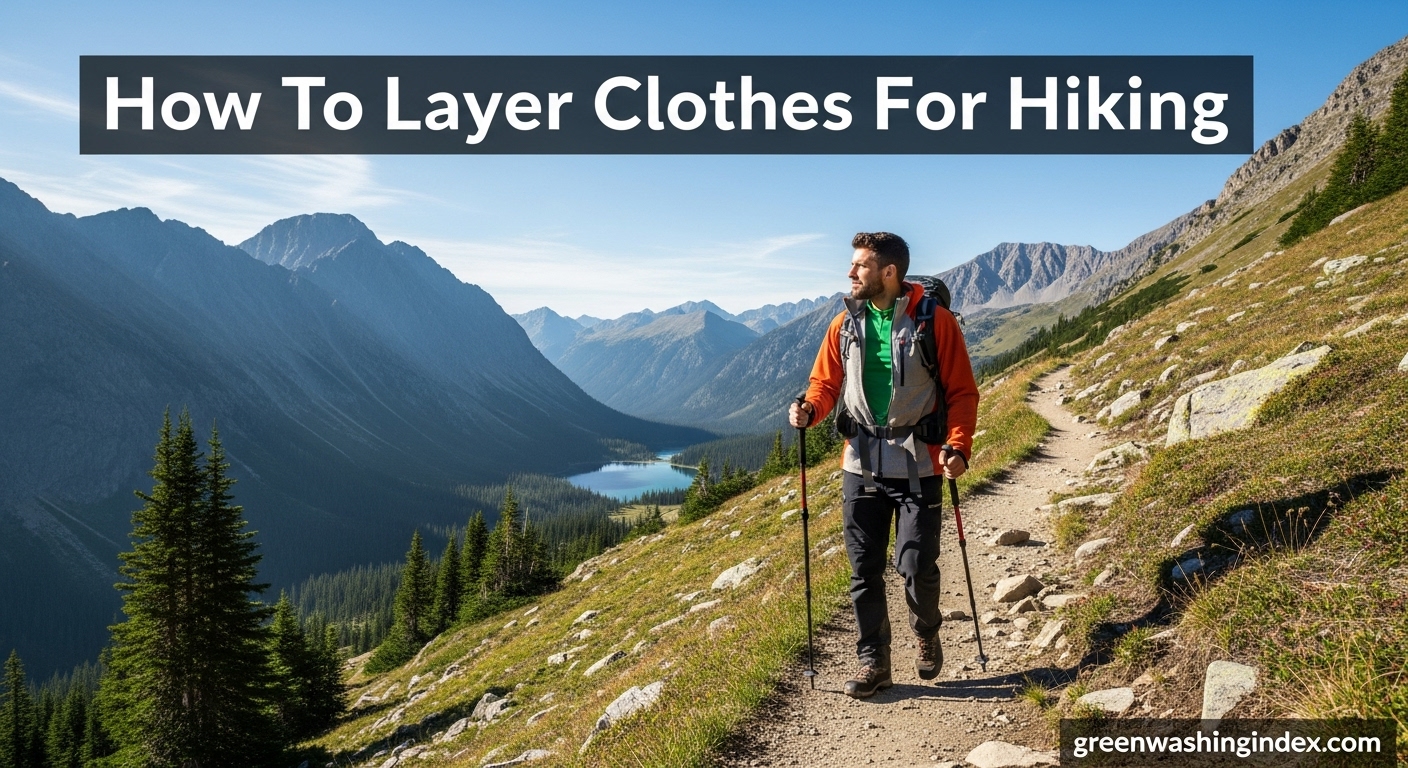
I learned the importance of proper layering the hard way during a solo hike in the Smokies. Temperatures dropped 20 degrees from trailhead to summit. I was sweating in my cotton t-shirt on the ascent and shivering dangerously at the top.
To layer clothes for hiking, use a simple three-layer system: a moisture-wicking base layer against your skin, an insulating mid layer to trap heat, and a protective outer shell to block wind and rain. Add or remove layers as your activity level and conditions change.
This system keeps you dry, warm, and adaptable to whatever mountain weather throws your way. After testing different combinations on over 200 trail days, I’ve found the right layers make the difference between an miserable slog and an enjoyable adventure.
Let me break down exactly how to build your own layering system.
The layering system is a strategic approach to wearing clothing that manages moisture, insulation, and protection through separate, complementary layers.
Think of it like your home’s thermostat.
Instead of one massive coat that overheats you during exertion, you have modular components you can adjust throughout your hike.
Each layer has a specific job: moving moisture away from your skin, trapping body heat, or blocking external elements.
When you work hard climbing a ridge, you shed layers to avoid soaking yourself in sweat.
When you stop for lunch at a windy summit, you add them back before the chill sets in.
This adaptability is why seasoned hikers never wear a single heavy jacket.
Quick Summary: The layering system gives you precise temperature control through three specialized layers. Base layer wicks moisture, mid layer insulates, outer layer protects. Adjust combinations based on weather and exertion level.
The three-layer hiking system consists of a base layer that manages moisture, a mid layer that provides insulation, and an outer layer that delivers weather protection.
Here’s how the system works together:
The magic happens in how these layers interact.
Your base layer prevents sweat from accumulating against your skin, which would otherwise make you cold when you stop moving.
The mid layer creates dead air space that your body warms up, functioning like insulation in your house walls.
The outer layer protects that insulation from wind and rain while still letting moisture vapor escape.
You don’t need all three layers in every condition, but having access to each gives you complete control over your comfort.
Check out our guides on men’s base layers and sustainable thermals for specific product recommendations.
The base layer is your first line of defense against moisture, sitting directly against your skin to wick sweat away and keep you dry.
A good base layer performs one critical function: moving moisture away from your skin faster than your body produces it.
| Material | Pros | Cons | Best For |
|---|---|---|---|
| Merino Wool | Naturally odor-resistant, comfortable in wide temp range, biodegradable, soft against skin | More expensive, slower drying, less durable | Multi-day trips, temperature sensitivity, sustainability focus |
| Synthetic (Polyester) | Faster drying, more durable, less expensive, excellent wicking | Holds odors, petroleum-based, microplastic shedding | High-output activities, budget-conscious hikers, wet climates |
| Synthetic Blend | Balance of wool comfort and synthetic performance | Compromise on both fronts | General use, day hiking |
I’ve worn both extensively, and here’s my take: merino shines on multi-day backpacking trips when you want to wear the same shirt for three days straight without offending your trailmates.
Synthetics dominate for high-output activities like trail running or steep climbs because they dry literally twice as fast.
Sustainability Note: Merino wool is renewable and biodegradable, making it the eco-friendly choice. If you choose synthetics, look for recycled polyester and wash in a microplastic filter bag to reduce environmental impact.
Fit matters more than most beginners realize.
Your base layer should make contact with your skin across your back, chest, and underarms to effectively wick moisture.
Too loose, and sweat pools against your skin.
Too tight, and you restrict circulation and feel constricted.
The mid layer provides insulation by trapping warm air close to your body, functioning as your primary temperature regulation tool.
This is the layer you’ll adjust most frequently on the trail.
Climb hard and generate heat? Strip off the mid layer and let your base layer handle moisture management.
Stop at a windy overlook? Pull it back on before you start cooling down.
| Mid Layer Type | Weight (Men’s M) | Warmth-to-Weight | Dries When Wet | Best Conditions |
|---|---|---|---|---|
| Light Fleece (100-weight) | 6-8 oz | Low | Fast | Active hiking in cool weather, high output |
| Mid Fleece (200-weight) | 12-16 oz | Medium | Fast | Variable conditions, moderate output |
| Synthetic Puffy | 10-14 oz | High | Medium | Cold dry conditions, rest breaks |
| Down Puffy | 8-12 oz | Very High | Slow | Cold dry conditions, camp wear |
Fleece jackets excel during active hiking because they breathe exceptionally well and maintain warmth when wet from sweat or light rain.
I reach for my 200-weight fleece on 40-60°F days when I’m moving steadily.
Puffy jackets (either synthetic or down insulation) pack smaller and provide more warmth per ounce, making them ideal for backpacking when space is limited.
The downside: they don’t breathe as well during exertion.
See our guide to the best midlayers for specific recommendations.
Your mid layer choice should match your exertion level:
High Output (steep climbing, trail running, fast packing): A light fleece or even just your base layer. You’ll generate enough heat that heavy insulation causes overheating.
Medium Output (typical day hiking, moderate terrain): Midweight fleece is your friend. Put it on at trailhead, take it off during climbs, back on for breaks.
Low Output (winter hiking with frequent stops, photography trips): A synthetic puffy provides maximum warmth and packs small enough to add over your fleece.
Pro Tip: Always put your mid layer back on during breaks, even if you feel warm. Your body temperature drops rapidly when you stop moving, and once you’re chilled, it’s hard to warm back up.
The outer layer (shell) protects your insulation from wind and precipitation while allowing moisture vapor to escape from your layers underneath.
This layer faces a dual challenge: keep external water out while letting internal water vapor escape.
Get this wrong, and you’ll either soak from rain outside or sweat from inside.
I carry a lightweight hardshell on almost every hike except predictable summer days.
The versatility is worth the weight.
For specific recommendations, check out our guide to the best hardshell jackets.
DWR (Durable Water Repellent) is the coating that makes water bead up on your shell’s exterior.
It’s not what makes the jacket waterproof—that’s the membrane underneath.
DWR prevents the outer fabric from saturating, which maintains breathability.
When your DWR wears off (and it will), the outer fabric wets out and your jacket feels like a plastic bag even if the membrane is still working.
DWR: Durable Water Repellent treatment applied to outer fabrics that causes water to bead and roll off rather than soaking in. Reapply periodically with spray-on or wash-in treatments to restore performance.
You’ll know your DWR is failing when water stops beading and starts spreading across the fabric surface.
Don’t retire the jacket—just reapply DWR treatment.
Sustainability Note: Many DWR treatments historically contained PFCs (perfluorocarbons), which are persistent environmental pollutants. Look for PFC-free DWR treatments from brands like Patagonia, Houdini, and others leading the eco-conscious movement.
How you combine these three layers depends entirely on conditions and your planned activity.
Here’s a practical guide for common hiking scenarios:
| Condition | Temperature | Layer Combination | Adjustments |
|---|---|---|---|
| Summer Day | 70-85°F, sun | Lightweight base layer + hiking shorts | Add sun shirt for protection, carry light shell for storms |
| Crisp Fall | 50-65°F, variable | Midweight base + light fleece + wind shell | Add/remove fleece based on exertion |
| Cold Clear | 30-45°F, dry | Midweight base + mid fleece + puffy available | Use puffy for breaks, fleece for hiking |
| Rainy Day | 45-60°F, wet | Lightweight base + light fleece + hardshell | Minimal layers under shell to reduce sweating |
| Winter | 15-30°F, snow | Heavyweight base + fleece + hardshell + puffy | Add insulated pants, goggles, gloves, hat |
| Alpine Start | 40-60°F, cold ascent | Light base + puffy over shell approach | Start cold, add layers at summit |
The key insight from this table: you wear less than you think when hiking hard.
Most beginners overdress and end up soaking their layers in sweat, then freeze when they stop.
I’ll say this plainly: you should be slightly cold for the first 15 minutes of any hike.
If you’re perfectly warm at the trailhead, you’re overdressed.
Your body will generate heat as soon as you start moving.
Being slightly chilly at the start beats being drenched in sweat five minutes later.
“Start cold, finish warm. The moment you feel yourself getting warm, it’s already too late—you’ve started sweating into your layers.”
– My guide during a mountaineering course in 2026
Rain creates a layering challenge because your hardshell limits breathability.
Wear fewer layers underneath than you would in dry conditions.
I typically wear just a lightweight base and thin fleece under my rain shell, even at 45°F.
The shell blocks enough wind that I stay warm, and the reduced layering prevents the sauna effect inside my jacket.
Don’t forget your rain pants and proper footwear for wet conditions.
In eight years of hiking and countless trail miles, I’ve seen these mistakes repeatedly.
Learning from others’ errors saves you discomfort and potential danger.
Cotton is comfortable, but it’s actively dangerous in the backcountry.
Here’s why: cotton absorbs moisture (up to 27 times its weight) and loses all insulating value when wet.
Wet cotton against your skin draws heat away from your body 25 times faster than air.
This is how hypothermia happens in 50°F weather.
I’ve met day hikers in cotton jeans and t-shirts who ended up with mild hypothermia after an unexpected thunderstorm turned their summer stroll into an emergency.
Leave cotton for car camping and backyard lounging.
Warning: Never hike in cotton denim jeans. When wet, they become heavy, restrict movement, and accelerate cooling. Cotton kills is an outdoor industry cliche because it’s literally true.
You see it every weekend at popular trailheads: hikers bundled up like they’re heading to a football game in November.
Twenty minutes up the trail, they’re stopping to peel off three layers while already sweating through their base.
This mistake creates two problems: you soak your layers before the real climbing starts, and you carry unnecessary weight all day.
Follow the start-cold rule and trust that you’ll warm up quickly.
It sounds obvious, but I’ve seen hikers put their puffy jacket OVER their rain shell.
This renders both layers ineffective: the shell can’t protect the puffy from getting wet, and the puffy’s insulation gets compressed by the tight shell, losing loft and warmth.
Shell always goes on the outside.
That’s its entire job.
Most layering advice focuses on your torso, but your legs need consideration too.
In cold conditions, consider baselayer bottoms under your hiking pants or convertible pants.
For winter hiking, insulated pants or shell pants with a base layer underneath keep you warm when you’re breaking trail through snow.
In summer, quality hiking shorts or women’s hiking shorts provide ventilation and freedom of movement.
Once your layers are soaked from sweat, they can’t dry while you’re wearing them in cold conditions.
The key is proactive venting: unzip your pits, roll up your sleeves, or remove your mid layer BEFORE you’re dripping wet.
I set reminders on my watch during long climbs to check my temperature status.
It’s easier to stay dry than to dry out soaked layers on the trail.
The three layers are: a base layer that wicks moisture away from your skin, a mid layer that insulates by trapping heat, and an outer layer that protects from wind and rain. Each layer serves a specific purpose and works together as a system.
Base layers should fit snugly against your skin to effectively wick moisture, but not so tight that they restrict circulation or feel uncomfortable. The fabric needs full contact with your skin to do its job properly.
Cotton absorbs moisture and loses all insulating value when wet. Wet cotton against your skin conducts heat away from your body 25 times faster than air, which can lead to hypothermia even in mild temperatures. This is why experienced hikers say cotton kills.
For rain, wear fewer layers than usual under your waterproof shell. I recommend just a lightweight base layer and thin mid layer. The shell blocks wind, so you stay warmer than expected, and reduced layering prevents the sauna effect inside your jacket.
Merino wool excels for odor resistance on multi-day trips and provides comfortable temperature regulation, but synthetics dry faster and cost less. Merino is more sustainable and biodegradable, while synthetics shed microplastics but offer better durability.
Winter hiking typically requires four components: a heavyweight base layer, fleece mid layer, waterproof outer shell, and an insulated puffy jacket for breaks. Add a hat, gloves, and consider baselayer bottoms and insulated pants depending on temperature.
Mastering the layering system transformed my hiking experience from miserable struggles to comfortable adventures. The investment in quality layers pays dividends every time you hit the trail.
Start with a good base layer and build from there based on your typical conditions. You don’t need to buy everything at once—a midweight base, simple fleece, and basic rain shell will cover most three-season day hikes.
As you spend more time on the trail, you’ll discover what works for your body, your local climate, and your hiking style. The layers I wear in the Pacific Northwest rainforest differ from what I’d choose for desert canyons or Rocky Mountain alpine routes.
That’s the beauty of the system: it adapts to any environment once you understand the principles. Stay dry out there.