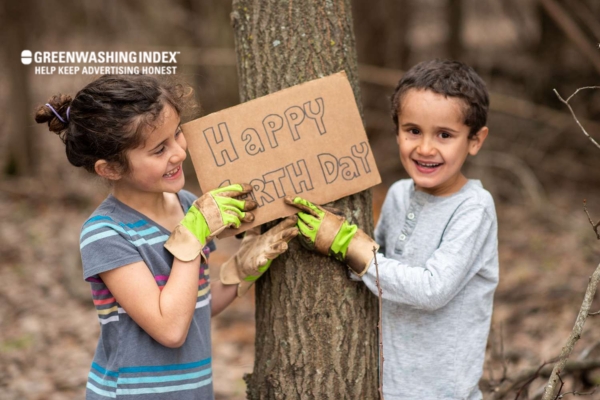
Imagine a day filled with laughter, glue on your fingers, and a colorful mess all around. Now add the heartwarming feeling of doing something good for our planet. This is what you get when you dive into Earth Day Crafts with your kids. These activities are more than just fun; they teach our young ones about caring for the environment in a way that sticks.
When wondering about ingenious ways to celebrate Earth Day with children, crafts stand out as an enjoyable and informative approach. By integrating creativity with eco-consciousness, kids not only create art but also develop an appreciation for protecting our world. After all, there’s no better time to instill these values than now.
What You’ll Take Away:
- Unlock the joy of eco-friendly crafting
- Explore 30 genius ideas for kids’ creative play
- Combine learning and environmental care effortlessly
- Easy-to-follow projects for educational fun at home
- Embrace simplicity in creating beautiful Earth-themed art
Celebrating with Purpose: Engaging Kids in Earth-Friendly Activities
Earth Day is a special time. It’s a day when everyone around the world thinks about our planet. It’s important because it helps us remember to take care of the Earth. One great way to celebrate this day is by making Earth Day crafts with kids. These aren’t just fun; they teach kids how to be better friends with our planet.
Crafting Memories While Saving Our Planet
When I sit down with kids to make Earth Day crafts, I’m doing more than just keeping them busy. We’re making memories together and learning about how to take care of the earth at the same time. Let me tell you why this is so good for kids and our planet:
- Creative Fun: Kids love making things with their hands. When we choose Earth-friendly projects, they get to have fun and be creative.
- Learning Together: As we make these crafts, I talk with the kids about why we need trees, clean water, and animals. They learn while having fun.
- Less Waste: Many crafts can use things that might otherwise be thrown away, like paper rolls or old buttons.
Here are some smart ideas for easy-to-make Earth Day crafts that every kid will enjoy:
- Recycled Bottle Planters: We start by taking empty plastic bottles and cutting them in half carefully (this part is for grown-ups). Then, children can draw faces on these ‘bottle heads’ using markers or paint; top off this activity by adding some soil and seeds inside them!
- Nature Collage: On a piece of cardboard, we stick leaves, twigs, or flower petals collected from a garden or park walk.
- Bird Feeders from Pine Cones: First, we find pine cones outside, then spread peanut butter on them (messy but super fun!). After that, roll them in birdseed – Now hang them up on trees for birds!
Each of these activities is not just playtime – they are treasure maps leading us toward a greener tomorrow.
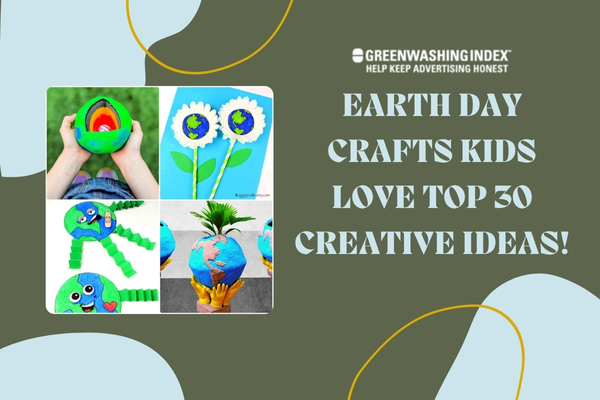
30 Best Earth Day Crafts for Kids
Earth Day is a special day when we think about our planet and how to keep it healthy. For children, this can be a fun day to make crafts that also teach them about the earth. Here are some really smart and fun Earth Day crafts that kids will love.
1. The Bug Motel: Encouraging Biodiversity
When I think about genius Earth Day crafts, making a Bug Motel is at the top of the list. This craft is perfect for kids who love to explore nature and learn how different insects live together. Using recycled materials becomes a double win as we teach our little ones about ecosystems in a fun way.
Here’s how you can create your very own Bug Motel with your kids:
- Materials You’ll Need: Gather some old boxes or milk cartons, straws, twigs, leaves, and any other natural materials you can find. Don’t forget to grab some glue or tape.
- Building the Structure: Help the kids stack and stick the boxes together to create little rooms – our motel rooms for bugs!
- Collecting Nature: Go on a nature scavenger hunt with your children to fill each “room” with twigs, straws, and leaves – all these are like cozy beds for different bugs.
- Invite Guests: Once your motel is ready and set outside in your garden or on a balcony, it gives various insects places to chill out.
- Observing Nature: Use this craft as an opportunity to talk about what kind of bugs might visit and what they do in our natural world.
As simple as that! You’ve got an ecological haven that protects our tiny friends and helps maintain biodiversity!
2. Moss Balls: A Lesson in Sustainable Plant Life
Moss balls are enchanting little green globes that teach us about growing plants sustainably. If you’ve got children with green thumbs or just want a unique way to get into gardening without too much fuss, this one’s for you!
Let me guide you through creating moss balls:
- Sourcing Your Moss: Find some live moss around your yard, often found on rocks or tree bases.
- Creating Soil Balls: Take some clay soil (it sticks well) and help your kids form small round soil balls.
- Wrapping the Balls in Moss: Lay pieces of moss over the soil balls until they’re completely covered.
- Securing Everything Together: Thin pieces of biodegradable string should do the trick to keep everything tightly wrapped up.
- Caring for Your New Plant Friend: Soak them in water every so often so they don’t dry out—moss loves moisture.
Moss balls are not only simple crafts but also introduce an eco-friendly approach to planting!
3. Paper Bag Canvas: Unleashing Creativity Ecologically
Who would have thought that a humble paper bag could turn into an eco-friendly canvas? It’s all part of being resourceful while having some artistic fun this Earth Day.
Here’s how children can transform these bags into works of art:
- Finding Paper Bags: Look around at home; grocery bags are good choices because they’re easy to find and usually free from any prints or designs.
- Preparation Is Key: Flatten out those bags nicely so they become smooth surfaces ready for painting or drawing upon—just like real canvases!
- Get Creative! Hand over paints (water-based is better for Mother Earth), pens, crayons – whatever lets their creative juices flow.
- Display Their Artwork proudly: Once done, display their creations around the home — like windowsills or pinned up on walls—to show off their talent.
This super-simple craft encourages creativity while staying mindful of using resources wisely. Each one of these Earth Day crafts offers kids hands-on educational fun while underlining the importance of taking care of our environment through eco-friendly projects.
Whether it’s giving bugs a new home with The Bug Motel crafting activity, going green-thumb crazy with sustainable Moss Balls gardening time, or turning paper bags into artistic masterpieces—it’s all about blending creative activities seamlessly into environmental learning!
4. Egg Carton Trees: Cultivating a Mini Forest
I love the idea of turning simple things around my house into genius Earth Day crafts. One of my favorite activities with kids is making egg carton trees. This is more than just a craft; it’s about teaching the importance of trees and reforestation. Let me tell you how to make these cute little trees:
- Gather Your Materials: You’ll need an empty egg carton, scissors, green paint, a paintbrush, and some brown clay or playdough.
- Cut the Carton: Carefully cut out each egg holder from the carton. These will be your tree tops.
- Paint the Trees: Let the kids paint the inside and outside of each egg holder with green paint to simulate leaves.
- Shape the Trunks: While those dry, roll your brown clay or playdough into small cylinders—these will be your tree trunks.
- Put Them Together: When everything is dry, poke a small hole in the center of each painted egg holder and push one end of a clay trunk inside.
- Create Your Forest: Arrange your mini trees on a tray filled with soil or on blue paper to represent water.
Why is this important? We all know that trees are essential for clean air and preventing soil erosion. By crafting these mini forests, kids understand that every tree counts in keeping our planet healthy.
5. Colorful Suncatchers: Radiating Eco-Awareness
Another creative activity for kids involves light and color—I’m talking about making colorful suncatchers from recycled materials! Here’s how you can catch some rays:
- Collect Transparent Plastics: Look for colored plastic lids or containers that can be cut safely into shapes.
- Design Your Art: Kids can draw patterns on their plastics using permanent markers, which adds more detail to their creations.
- Cut Out Shapes: Snip out these plastic drawings carefully so no sharp edges remain.
- Make them Shine: Punch holes at the top and thread string through so they can hang against a window.
Why bother? These suncatchers showcase how recycled materials can transform into art that celebrates light—the same sun that powers our Earth!
6. Upcycled Desk Organizer: Tidy Space, Tidy Mind
The last Earth Day craft I want to share helps kids keep their spaces tidy while being mindful about reusing—that’s creating an upcycled desk organizer.
- Find old containers like cans or jars—make sure they’re clean!
Gather supplies Like colorful paper, glue, stickers, or anything else fun for decorating.Prepare ContainersRemove any sharp edges from cans if there are any; peel off labels, too!- Decorate cans on paper or draw directly onto jars with markers; make them bright!
- OrganizePut. Put pencils in one container, crayons in another… you get it!
Creating something new out of old items teaches kiddos about reducing waste—and how even small acts help our environment big time!
7. Wildflower Seed Bombs: Planting with Purpose
When I think about Earth Day Crafts, the idea of making Wildflower Seed Bombs really stands out. It’s a brilliant way to help local habitats and support pollinators like bees and butterflies.
- Why Make Wildflower Seed Bombs?
- They’re easy to make with kids.
- They teach valuable lessons about nature.
- They add beauty to bare spots in gardens.
- What You Need:
- Wildflower seeds native to your area
- Natural clay
- Compost or potting soil
- Water
- A bowl for mixing
- How To Make Them:
- Mix equal parts of clay, compost, and wildflower seeds in a bowl.
- Add enough water to help the mix stick together.
- Roll the mixture into small balls about the size of marbles.
- Impact on Habitats and Pollinators:
- When these seed bombs are thrown into garden spaces, they break down naturally.
- The seeds sprout into flowers that provide food for pollinators like bees and butterflies.
- These plants can also improve soil health and support other wildlife.
Making these Earth Day Crafts isn’t just fun; it’s an important act that helps the environment right outside our doorsteps.
8. Upcycled Maze: Enhancing Problem-Solving Skills
Upcycling is great, especially when we can turn it into a fun Earth Day Craft like creating a maze. This isn’t just an ordinary puzzle; it’s a labyrinth made from materials we would otherwise throw away!
- Materials Needed:
- Recycled cardboard boxes
- Old tubes
- Scissors or box cutters
– Glue or tape
- Making The Maze:
- Flatten cardboard boxes to create your maze base.
- Cut smaller pieces of cardboard or tubes as barriers for your maze pathways.
- Arrange them in complex patterns on the base.
- Cognitive Benefits for Kids:
- Manipulating pieces boosts their spatial awareness skills.
- Figuring out maze solutions sharpens their problem-solving abilities.
Creating this kind of eco-friendly project not only keeps materials out of landfills but also helps kids’ brains grow stronger through educational fun!
9. Recycled Quilt: Crafting Comfort with Memories
Do you know that old clothes and fabric scraps can turn into something warm and full of memories? Let me tell you about making a recycled quilt. This Earth Day craft is not just fun; it holds a piece of history in every patch.
A quilt is like a big, warm blanket. But it’s special because it’s made from many small pieces of fabric stitched together. Each piece can come from an old shirt, a dress that doesn’t fit anymore, or even your favorite baby clothes. When we use these bits for our Earth Day crafts, we give them new life.
- Step One: Gather Your Fabrics
Find all the old clothes and fabrics you don’t need. Look for different colors and patterns that make you smile. You can ask family members if they have anything to add, too!
- Step Two: Cut into Squares
Now, cut your fabrics into squares that are all the same size. If this is your first time, start with bigger squares – they’re easier to sew together.
- Step Three: Lay Out Your Design
Before sewing, lay your squares on the floor to pick how they’ll look when put together. Think about the colors and patterns next to each other. Do they look good? Move them around until you’re happy.
- Step Four: Sew Together Squares
Take two squares and put them side by side with the patterns facing each other inside like a sandwich. Sew along one edge, then open them up like a book! Keep adding squares until you have made a row.
- Step Five: Make More Rows
Repeat step four until you have enough rows to make your quilt as big as you want.
- Step Six: Join Rows Together
Sew the rows together just like how you did with the squares—pattern sides touching inside and sewn along one long edge.
- Step Seven: Add Batting and Backing
Now lay down batting (a layer of fluffy material) over your quilt top for warmth. Then lay another big piece of fabric underneath—it will be the backside of your quilt!
- Step Eight: Quilt It
Quilting means sewing through all three layers—the top design, batting in between, and backing—to hold them together well. You can do straight lines or any pattern!
- Final Step Nine: Bind The Edges
Cover up those raw edges by sewing on a strip known as ‘binding’ right round at the edge. You’ve now got yourself an eco-friendly craft that’s also full of meaning!
What I love about this crafting project is every square tells its own story, maybe where I was when I wore that t-shirt or who gave me that scarf as a gift. Putting them all in my Earth Day quilt gives me something unique while helping our Earth by recycling what we’ve got at home!
10. Fairy House: Igniting Imagination with Natural Materials
Creating a fairy house with my kids is not just fun; it teaches them to value nature. Here’s how we do it:
- Find a Good Spot: We start by looking in our garden for the perfect place. It could be at the base of a tree or in a cozy corner.
- Gather Natural Materials: We then collect twigs, leaves, stones, and pinecones. These are gifts from nature that don’t cost anything.
- Recycle: We also look for things we already have, like old jars or pieces of fabric that can become windows or doors.
- Assemble the House: Next, we stack twigs to make walls and use mud or clay as glue. Leaves become roofs, and stones lay out a little pathway.
- Decorate: With the structure in place, my kids get creative decorating their fairy house using brightly colored pebbles or making tiny furniture from the bark.
I encourage them to think about who might live there. It’s lovely to watch their imaginations soar as they work with simple materials from our backyard.
11. Upcycled Garden Seating: Eco-Friendly Relaxation
We love relaxing outside, and upcycling old furniture into garden seating is our eco-friendly solution:
- Choose Furniture: I look for old chairs that maybe aren’t good enough for inside the house anymore but can still hold up outdoors.
- Clean and Repair: The kids and I clean them up together and fix any loose parts so they are safe to sit on.
- Painting Time!: If needed, we add a coat of weather-resistant paint, which not only protects them but also gives them new life.
- Add Comfort: Cushions often come next – using durable fabric suits outdoor life best – sometimes made from old curtains!
- Place Thoughtfully: Finally, we find spots in our garden where they’ll be most enjoyed – under trees for shade or near flowers for butterflies.
It’s wonderful how an item ready to be thrown away can turn into an inviting spot in your yard.
12. Wild Nature Wreath: Celebrating the Seasons Sustainably
Each season brings its own beauty – making wreaths from natural materials is our way of celebrating this diversity:
- Material Hunt: First off, I take my kiddos out to explore around us – maybe it’s stuck in winter or leaves in fall; each season has something special.
- Wreath Base Making: With some vines or flexible branches found along the way, we shape our base into circles by twisting and overlapping ends together securely.
- Binding Together: To attach our findings like leaves, acorns, or flowers, we use natural twine so everything holds nicely onto the base without harming nature.
Finishing Touches:
We look at what else can make it unique—perhaps some berries (make sure they’re safe!) or seeds—and add those last details before hanging on our door with pride.
It reminds us of all of Earth’s cycles – winter gray gives way to spring greenery, followed by summer blooms until autumn colors wrap it up again before starting anew!
In these activities – building fairy houses from sticks and mud, turning tired chairs into lovely seats, crafting seasonal wreaths – lies educational fun, showing my kids that being eco-friendly is simple if you tap into your creativity!
13. Aluminum Recycling Organizer: Sorting with Style
Everyone knows it’s good to recycle, but sometimes it can be messy. Let me tell you how to keep things tidy while helping the planet. We can make an aluminum recycling organizer at home that’s as stylish as it is useful.
Here’s what you’ll need:
- A large cardboard box or several smaller boxes
- Paint or wrapping paper
- Scissors and tape or glue
- Markers or stickers for labeling
Now, let’s get to work:
- Choose Your Boxes: Look around your house for a big cardboard box that could fit all your aluminum cans. If you can’t find one big one, no worries – grab a few small ones instead.
- Clean Them Up: Make sure the boxes are clean – no leftover food or sticky spots!
- Decorate: Now comes the fun part! You can paint your boxes with bright colors or cover them in pretty wrapping paper. Get creative – maybe draw some flowers or stars on them?
- Cut Holes: If you’re using small boxes for different types of cans, cut a hole at the top of each box so you can drop cans in easily.
- Glue or Tape: If you’ve got different boxes for different cans (like one for soda and another for soup), stick them together side-by-side with tape or glue so they don’t move around.
- Label Them: Use markers to write what goes in each box – like “Soda Cans” and “Soup Cans.” Or maybe use cool stickers!
- Start Sorting: Put your new organizer where you usually throw away cans and start recycling with style!
By doing this project, not only do I have a neat place to collect my recyclables, but I also encourage my family to think before they toss! It reminds us all that sorting our waste is important.
14. Paper-Mache Pots: Biodegradable Gardening
Plastic pots aren’t great for Earth because they take so long to break down when we’re done with them—which isn’t great! But guess what? We can make pots out of paper instead—and they’re kind enough to melt back into the Earth when we’re finished using them!
Let’s see how these eco-friendly pots are made:
You’ll need these materials:
- Recycled newspaper or any paper scraps
- Flour and water (for the paste)
- A small bowl or balloon (as a mold)
- Paints (if you want)
Time to create:
- Tear Up Paper: Rip up lots of newspaper into strips – they should be about an inch wide.
- Make Paste: Mix water and flour until it looks like thick soup—that’s your paste!
- Dip The Strips: One by one, dip those paper strips into the paste; make sure they get soaking wet but not drippy.
- Shape Your Pot: Use a bowl turned upside down as a shape guide, and lay the wet strips over it layer by layer; if using a balloon, blow it up first and then lay the strips onto half of it.
- Dry Time: Let your pot dry completely—this might take up to 24 hours, depending on how many layers there are.
- Paint: Once dry, if you want pretty pots, paint them however you like – don’t forget eco-friendly paints!
- Plant reminder: When planting time comes, pop soil directly in these biodegradable pots—plants love ’em since roots grow right through, which means less shock moving from pot to soil.
So every time I start seedlings in my paper-mache pots, I smile, knowing my garden’s getting greener in more ways than one!
15. Plastic Bottle Bird Feeder: Feeding Feathers with Upcycling
Look around—there are plastic bottles everywhere, unfortunately, but here’s how we turn one into something amazing—a bird feeder! It’s simple yet brilliant because not only do we reuse something headed for trash but also give birds snacks, especially during tough seasons when food isn’t easy: peasy lemon squeezy!
Here we go:
You’ll need these items:
- A used plastic bottle
- Two wooden spoons
- Scissors (get help from an adult!)
- String
And now, let’s build:
- Clean Bottle: First, wash out that plastic bottle nice & clean, with no sugary residue or yucky stuff left.
- Cut Holes: Near the bottom, cut two X-shape holes opposite each other, big enough for spoon handles to stick through.
- Stick Spoons: Shove spoons through X holes—one above the other—spoon parts sticking out act tiny platforms where birds land and munch away!
- Filler Up: Pop open the cap and pour bird seeds right into the bottle till about halfway full—the seeds will automatically refill the feeding platform as the bird’s snack.
- Hang It High: Tie string round neck of bottle hangs from tree branch somewhere quiet watch little flyers come to dine!
Making this feeder taught me two awesome things – thriftiness plus caring for nature creatures, which is kinda like hitting two birds… well feeding is never hitting, right? Anyway, happy Earth Day crafting, everyone!
16. Newspaper Birds: Crafting an Avian Awareness
Newspaper birds are more than just a fun craft for kids. When I make these Earth Day crafts with children, I like to turn them into a lesson about our feathered friends and their place in the world. Here’s how we can use simple materials to learn about big issues:
- Gather Your Materials: Start by finding old newspapers, some non-toxic glue, scissors, and maybe some paint or markers.
- Pick an Endangered Bird: Choose a bird species that is at risk of extinction or is already endangered.
- Shape Your Bird: Tear or cut the newspaper into strips or shapes that will form your chosen bird’s body and wings.
- Glue it Together: With your homemade glue (I’ll show you how to make this later), start sticking these pieces on a base made from more newspaper to give shape to your creation.
- Discuss Conservation: While crafting, tell stories about the bird species you are making—what dangers they face, like habitat loss or climate change, and why they are important.
- Display with Information: When finished, set up a space where all the birds can hang together with written information about them—creating a small exhibit invites more learning opportunities.
Creating these genius crafts is educational fun that helps kids understand environmental issues while they practice eco-friendly projects by repurposing what’s otherwise waste material!
17. Homemade Hanging Garden: Vertical Greenery for Small Spaces
Now, let me talk about making a smart hanging garden—a great way for both adults and kids to learn about growing plants, even if we don’t have much room!
- Collect Recyclable Materials: Hunt for things like empty plastic bottles, old shoe organizers, or any suitable container that can hold soil and plants securely when hung up.
- Design Your Garden Layout: Plan which containers will go where; think about what plants need more sunlight, so place them accordingly in the layout of your vertical space.
- Prepare Your Containers: Make sure they are clean! If using bottles, cut them open carefully to create pockets for soil and seedlings.
- Potting Time!: Fill each container with potting soil—recycled if possible—and then plant seeds of herbs, veggies, or flowers that do well in small spaces.
- Assembly Line Up: Hang containers on walls or balconies securely using ropes or chains; ensure there’s enough support since filled containers will be heavy.
- Water Wisely: Show kids how to water properly—only give as much as needed because too much might cause spills from overhead.
The whole process teaches us how tiny gardens help our planet—they clean our air and offer fresh produce, minimizing food miles—all within reach even in urban environments!
18. Shaving Cream Glue: A Homemade Adhesive Solution
Creating environmentally friendly crafts doesn’t stop at the activity itself—it even goes into the supplies we use! Here’s how we make our very own non-toxic adhesive:
- Ingredients First: All we need is regular white school glue and shaving cream—the kind without harmful chemicals as well as some baking soda to thicken it if necessary.
- Mixing it Up: Combine equal parts glue and shaving cream in a bowl—watch it puff up into a fluffy mixture! If the mix is too runny, just sprinkle in some baking soda until thick enough.
- Application Fun Time: Use a brush to spread this creamy glue onto paper fabric, whatever needs sticking. It dries clear, so don’t worry if little ones get messy.
- Environmentally Safe: Talk kids through why making this safe substitute matters —because commercial glues often contain substances bad for the earth, such as vapors contributing to pollution. Every bit counts, keeping playtime green.
By engaging with these creative activities, I not only bring fun challenges but also impart lessons about sustainability, recycling homemade solutions and essential components, and worthwhile craft sessions on Earth Day any day!
19. Upcycled Terrariums: Small Ecosystems in Recycled Glass
Have you ever seen a tiny forest inside a jar? It’s like magic, but really, it’s an upcycled terrarium. Let me show you how to make these Earth Day Crafts with old glass things you might have lying around.
- Collect Glass Containers: Look for any glass jars or bottles at home that aren’t being used anymore—like an empty spaghetti sauce jar or a big pickle jar.
- Clean Them Out: Make sure they are super clean – wash with soap and water and take off any stickers or labels.
- Gather Supplies:
- Get some small rocks or pebbles.
- Find some charcoal (the kind used for fish tanks).
- Have some potting soil ready.
- Choose small plants that fit inside your container—succulents work great!
- Layer Your Materials:
- Put the rocks at the bottom of the jar (this is for drainage).
- Add a thin layer of charcoal over the rocks (this helps keep your mini ecosystem clean).
- Now, add soil on top of the charcoal.
- Planting Time: Dig little holes in the soil and carefully put your plants in. Pat down the surrounding soil so they stand up straight.
- Decorate: You can add moss, tiny decorations, or even figures to make it look like a small world.
- Take care of your terrarium! Give it light but not direct sunlight, and mist it with water when the soil looks dry.
Just like that, you’ve made an eco-friendly project showing how nature works—in a jar!
20. Earth Day Popcorn: A Tasty Teaching Tool
Now, let’s talk about something yummy – popcorn! But this isn’t just normal popcorn; we’re going to learn about our planet Earth while making it.
- Start by popping some plain popcorn kernels – doing this on a stove is fun but needs grown-up help!
- Divide your popcorn into several bowls depending on how many ‘layers’ of Earth you want to represent – usually three for crust, mantle, and core; five if you’re adding other layers too!
- Use food coloring to dye each bowl of popcorn to match earth layers:
- Crust: Brown
- Mantle: Red
- Outer core: Orange
- Inner core: Yellow
- Mix them gently – we’re using colors to learn what’s under our feet without digging!
- Now layer them in a clear glass container:
- Start from the bottom, just like Earth’s layers:
- Yellow for the inner core,
- Orange for the outer core,
- Red represents the mantle, and
- Brown on top as crust.
- Talk about each layer as you add them: how hot they are and what they’re made from.
This becomes both snack time and learning time – see? Genius crafts can be super tasty, too!
21. Flower Art Project: Blossoming Creativity and Eco-Consciousness
Lastly, who doesn’t love flowers? They bring so much color into our world – let’s use them in crafts!
- Start by going on a little adventure outdoors– collect different kinds of flowers or leaves that have fallen naturally.
- Now, find recycled materials like cardboard from old boxes or paper bags where we’ll place our natural finds to create art.
- Arrange your flowers/leaves onto recycled materials however you feel looks nice– try making shapes or spelling out “Earth.”
- Make glue with flour and water if you don’t have any handy–this way, everything stays eco-friendly.
- Use this homemade glue to stick your natural finds onto your chosen recycled material.
- Once dried, hang up your flower art somewhere everyone can see!
It’s amazing how creative activities using natural elements and materials meant for recycling can teach kids about respecting beauty in nature while being mindful of our environment.
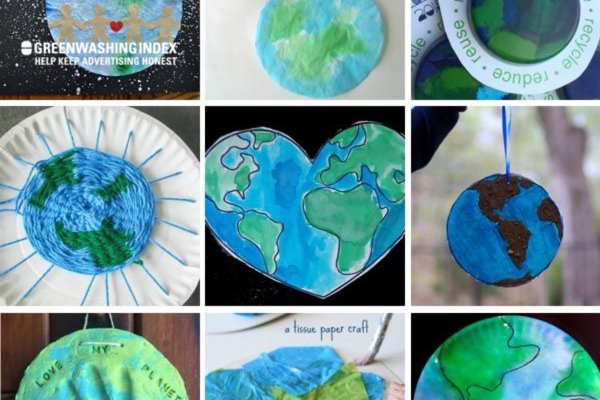
22. Tissue Paper Earth: Layering Love for Our Planet
When I make Earth Day crafts with kids, one craft I love is the Tissue Paper Earth. It’s a project that’s not just fun but also teaches something important.
Here’s how we do it:
- Gather Materials: First, we find some recycled tissue paper—this could be old gift wrap or tissue from shoe boxes. We want to use blue and green to represent water and land.
- Cut-Out Circles: Kids cut out a circle from plain paper for their base. The circle is our planet, Earth.
- Rip or Cut Tissue Paper: Small hands tear or snip up the tissue paper into little pieces. Blue pieces are for oceans, and green for continents.
- Glue in Layers: With a glue stick, children stick pieces onto their circles. They layer the pieces on top of each other like they’re adding layers of love to our planet.
As they place down green bits for land, I ask them about different places on Earth—mountains, rivers, forests. We talk about taking care of those spots and why each piece of land is special.
The blue bits are oceans and seas. Here, we discuss how to keep the water clean and protect the creatures living in it.
This craft gets kids thinking about our world as more than just a map or globe; it’s a home that we need to look after.
23. Multi-Colored Crayons: Recycling Wax into Rainbow Art
Recycling isn’t just good; it can be colorful, too! Multi-colored crayons are perfect examples of genius Earth Day crafts that mix creativity with being eco-friendly.
Let’s go through the steps:
- Sort Old Crayons: First off, kids sort through their crayon boxes to pick out broken ones or colors they rarely use.
- Peel Wrappers: (This can get sticky!) We get rid of those wrappers, so all that’s left is crayon wax.
- Break into Pieces: Kids break crayons into small bits—it doesn’t matter if colors mix because that’s part of the fun!
- Prepare Molds: We use mini muffin tins as molds (make sure they’re okay getting waxed).
Next comes the melting part—a grown-up’s job:
- Heat oven at low temperature
- Put tins with crayon bits inside
- Watch until they melt together
After cooling down:
Kids pop out brand-new rainbow crayons from molds!
Transforming old stuff into something fun gives me a chance to chat with kids about why recycling matters.
24. Plastic Bottle Cap Art: A Mosaic from Waste
Plastic bottle caps—usually seen as trash—are great materials for making beautiful art while teaching kids about the dangers of plastic waste.
Here’s what creating this kind of art involves:
- Collect Caps: For weeks before Earth Day, we collect bottle caps—different sizes make it better! Parents can help, too.
- Clean Them Up: Wash those caps so your art isn’t sticky!
- Plan Your Design: This could be an animal figure, landscape—or anything creative! Draw your design on cardboard as your guide.
- Begin Arranging Caps: Following your drawn design on cardboard helps keep things neat – start gluing caps down side by side.
- Fill In The Spaces: Use smaller caps to fill gaps or add detail; think like you’re painting but with plastic!
- Glue Everything Securely: Caps must get enough glue so they won’t fall off when you lift your masterpiece up to show everyone.
Creating these mosaics from bottle cap waste reminds us there are always clever ways to reuse things instead of tossing them aside – another crafty idea in celebrating Earth Day!
Earth Day Crafts are not just a fun way for kids to get creative. They’re also a brilliant way to teach them about our planet. Today, I’m excited to share some genius crafts that blend educational fun with eco-friendly projects.
25. Pasta World Map: Edible Geography
When you hear pasta, you think of food, right? But guess what? Pasta can also be used for learning! You can make a colorful world map with different shapes and colors of pasta. This craft is great for teaching kids about the many places on Earth.
- Choose Your Pasta: Begin by picking various types of pasta, such as spaghetti, rotini, or shells. Each shape can represent different things like mountains, rivers, or countries.
- Paint the Pasta: If you like color, paint some of the pasta pieces. Blue can be for water and green for land.
- Draw the World Map: Get a big piece of paper and draw the outline of a world map on it. You don’t have to make it perfect!
- Stick Your Pasta: Now, the fun part! Use glue to stick your painted pasta along the outlines on your map. Don’t forget the islands!
- Learn as You Craft: As you place each piece of pasta, talk about that place in the world—what language people speak there or what food they eat.
This activity is not only creative but very educational, too! Kids learn about geography and culture through playful art.
26. Pebble Art: Storytelling with Stones
Pebbles might look plain when you pick them up during a walk, but wait until you see how they tell stories in pebble art!
- Collect Pebbles: Take your kids outside to find some smooth pebbles in different sizes.
- Wash ’em Up: When you get home, wash those stones clean.
- Tell A Story: Arrange those pebbles into shapes on cardboard—maybe an animal shape or even people holding hands.
- Glue Your Story Down: Once you are happy with your design, use glue to stick those pebbles down tight.
- Talk About Earth: As each stone finds its place in your art, explain how every bit of Earth matters, just like every pebble in your story.
With this activity, children understand that small stones join together just like communities do!
27. Magazine Art: Crafting a Vision from Glossy Pages
Old magazines pile up fast both at home and everywhere else, right? Instead of throwing them away, let’s turn those pages into bright works of art!
- Sort Out Those Magazines: Look through old magazines together with your children and tear out pages with colors or pictures they find appealing.
- Cutting Time: Cut shapes out from these colorful pages—circles, squares, triangles, however creative they feel!
- Picture Perfect Plan: Decide what picture these shapes will form, maybe an animal or maybe something abstract—it’s all good.
- Glue It Together: Take cardboard as a base and start gluing down those cut-out pieces, following their plan, to create beautiful magazine mosaics.
This crafting process promotes recycling while sparking conversations about media consumption – why do we have so much waste from all these papers?
Using simple materials found around us, we’ve created Earth Day Crafts that are not only fun for children but also packed full of smart learning opportunities–from geography lessons with pasta maps to storytelling skills honed by arranging pebbles and developing awareness around recycling through vibrant magazine artworks. Genius crafts unite creativity, responsibility, and playful education all rolled into one, making eco-friendly projects truly educational fun!
28. Plantable Paper Earth: Sowing Seeds of Environmentalism
Making a Plantable Paper Earth is not just fun; it also teaches us to care for our environment. Here’s how I like to create these eco-friendly crafts with kids:
- Gather Materials: You need paper scraps, water, seeds that grow easily, and a blender.
- Tear the Paper: Rip the paper scraps into small bits.
- Soak the Bits: Place the torn paper in water. Let them soak until they’re easy to rip apart.
- Blend It: Take the soaked bits and blend them with water until you get a smooth pulp.
- Mix in Seeds: Now, add seeds to this pulp and stir gently with a spoon.
- Shape It Like Earth: Spread this seed-filled pulp on a screen in a circle shape, kind of like our planet Earth – maybe use blue and green paper for this!
- Press Out Water: Use a sponge or cloth to press out extra water carefully so you don’t harm the seeds.
- Let It Dry: Leave your paper shaped like Earth out in the sun or warm spot to dry.
Once it’s dry, kids can write messages on their Plantable Paper Earth and then plant it in the soil. Water regularly and watch as tiny plants start growing from their craft!
29. Paper Plate Earth Craft: Simple Symbols of Sustainability
I love using simple things around us for crafts that can help kids learn about caring for our planet – like making an Earth craft from paper plates.
- Find Recyclable Plates: Instead of new plates, find ones that you can recycle.
- Paint the Plates Blue: Use non-toxic paint to cover your plate blue for oceans.
- Add Green Landmasses: After drying the blue paint, add touches of green to represent the land.
- Share Recycling Facts: While crafting, talk about why recycling matters – how it helps save trees, which are homes for animals and give us air to breathe.
- Talk About Our Actions:While we let paints dry, we can think together about everyday actions that help our planet—like turning off lights when not needed.
This simple craft is perfect for exploring big ideas in an easy way!
30 Upcycling Art Wall: A Mural of Reclaimed Materials
Creating an Upcycling Art Wall is one amazing project! We take things we don’t need anymore and turn them into art treasures.
- Collect Reusable Stuff: The First thing I do is look around my home or ask friends for stuff they are throwing away—old buttons c, lids, and pieces from broken toys all work great
- Plan Your Design: Before sticking to anything, we plan what our mural might look like. Maybe it’s going be a picture of nature, some abstract shapes
- Clean Items Mural ReadyClean off any dirt and oil stuff so that it is ready to turn into
- Attach Your Mural thChoo spots hang mural could fence side building somewhere where lots of people can see and enjoy
- Hold an art party and gather friends and family together. Everyone participates. Stick items onto designated spots, glue tape whatever works best, and use
- Discuss Waste Reduction Finally once hanging is complete have a talk with everyone contributing about ways to reduce waste lives
Through this engaging creative activity, kids and adults alike get hands-on experience transforming waste into something beautiful while learning the importance of sustainability community effort.
Conclusion
After exploring these 30 genius Earth Day crafts for kids, it’s evident that being eco-friendly can be a fun and educational journey. The crafts we’ve discussed serve a dual purpose; they ignite creativity in children while instilling a deep appreciation for our natural world. Introducing kids to such activities promotes environmental stewardship from an early age, encouraging them to think about sustainability and the impact of their actions on the planet.
Crafting memories while saving our planet is not just an idea but a meaningful practice that aligns with the core message of Earth Day. By engaging in these creative endeavors, we teach our children essential lessons about conservation, biodiversity, and eco-responsibility in ways they find enjoyable and memorable. It’s remarkable how something as simple as repurposing materials into art can have such profound implications for environmental education.