
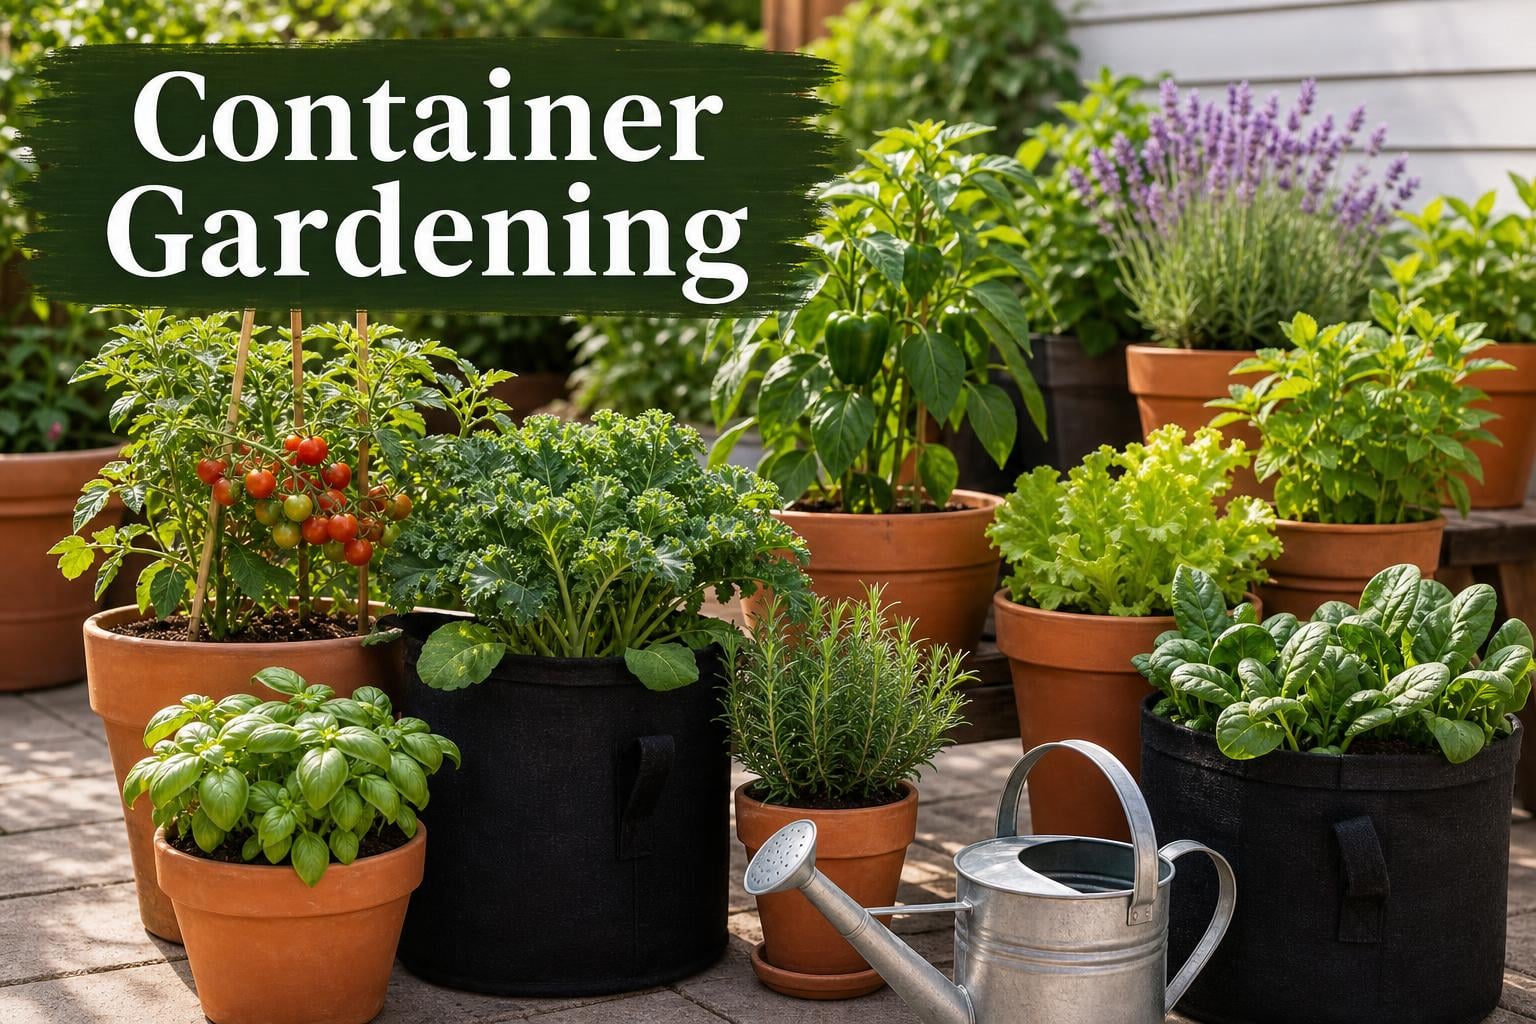
Container gardening has exploded in popularity as more people discover that you do not need a sprawling backyard to grow your own food, herbs, and flowers. Whether you have a tiny apartment balcony, a sunny patio, or even just a bright windowsill, growing plants in containers gives you a flexible and rewarding way to garden anywhere. In 2026, the global container gardening market continues to grow rapidly as urban dwellers, renters, and sustainability-minded homeowners embrace this space-saving approach.
But here is the truth that experienced gardeners wish someone had told them on day one: success with containers comes down to a few core principles that are easy to learn but costly to ignore. Choosing the right pot size, using quality potting mix instead of garden soil, understanding sunlight requirements, and developing a consistent watering routine are the foundations that separate thriving container gardens from disappointing ones.
In this guide, we walk you through every step of container gardening for beginners. You will learn how to select containers, prepare the right soil, pick plants that flourish in pots, arrange your garden for maximum growth, and keep everything healthy all season long. We have also included comparison tables, a common mistakes section, and answers to the most frequently asked questions to help you avoid the pitfalls that trip up first-time growers.
What you will learn in this guide:
Container gardening is the practice of growing plants in pots, planters, grow bags, or other contained vessels rather than planting directly in the ground. Instead of relying on in-ground soil, you fill containers with a specialized potting mix that provides the drainage, aeration, and nutrients your plants need. This method works for vegetables, herbs, flowers, fruits, and even dwarf trees, making it one of the most versatile approaches to growing plants.
The three essentials for a successful container garden are straightforward: containers with proper drainage holes, a quality potting mix designed for container use, and consistent watering combined with adequate sunlight. Get these three things right and you have the foundation for a productive garden in any space.
Why should you choose containers over a traditional garden plot? The advantages go far beyond simply saving space. Container gardening offers unique benefits that make it appealing for beginners and experienced gardeners alike.
You do not need a yard to grow a meaningful garden. A single balcony, a small patio, a rooftop, or even a sunny windowsill can support a surprising amount of edible and ornamental plants. Apartment dwellers and renters who cannot dig up the lawn can still enjoy fresh herbs, salad greens, and cherry tomatoes grown steps from the kitchen.
When you grow in the ground, you are at the mercy of your native soil. If it is heavy clay, too sandy, or pH imbalanced, your plants struggle. With containers, you start fresh every season with a high-quality potting mix that has the exact drainage and nutrient profile your plants need. This is especially valuable if your local soil is poor or contaminated.
One of the biggest advantages of growing in pots is that you can move them. If a plant is not getting enough sun, pick it up and relocate it. If a sudden frost is forecasted, carry tender plants indoors overnight. You can also rearrange your containers seasonally or rotate them to ensure every plant gets equal access to light.
Container plants sit above the ground, which naturally reduces exposure to soil-borne pests, crawling insects, and weeds. You will spend far less time pulling weeds from a pot than from a garden bed. Elevated planters take this a step further by keeping plants away from slugs and ground-dwelling critters.
For gardeners with mobility limitations, back pain, or difficulty bending, container gardening offers a practical solution. Elevated planter boxes bring the garden up to waist height, eliminating the need to kneel or stoop. This makes gardening accessible to seniors, wheelchair users, and anyone who finds traditional ground-level gardening physically challenging.
While container gardens do require attentive watering, the overall maintenance burden is lower than an in-ground garden of equivalent size. There is no tilling, minimal weeding, and smaller areas to manage. Self-watering containers and drip irrigation systems can further reduce the daily effort needed to keep your plants thriving.
Selecting the right container is the first major decision you will make, and it matters more than most beginners realize. The pot you choose affects root development, moisture retention, temperature regulation, and overall plant health. Let us break down the three factors that matter most: size, material, and drainage.
Size is the single most important container attribute. A pot that is too small will restrict root growth, dry out quickly, and limit your harvest. A good rule of thumb from the Old Farmer’s Almanac is that most vegetables need at least 12 inches of soil depth, and fruiting plants like tomatoes need a minimum of a 5-gallon container. When in doubt, go bigger than you think you need. Experienced gardeners on forums consistently report that larger containers lead to noticeably higher yields.
Here is a practical reference chart to help you match container size to the crops you want to grow:
Container Size vs Crop Type
Keep in mind that deeper containers hold moisture longer and give root vegetables room to develop properly. Shallow pots dry out faster and are best reserved for shallow-rooted plants like herbs and leafy greens.
The material your container is made from affects everything from weight and durability to how quickly the soil dries out. Here is a detailed comparison of the most common options:
Plastic Containers
Plastic pots are lightweight, affordable, and excellent at retaining moisture, which means you will water less often. They are available in virtually any size and style. On the downside, thin plastic can become brittle and crack after prolonged sun exposure. Look for UV-stabilized plastic if you want containers that last multiple seasons.
Terracotta and Clay Pots
Terracotta is porous, meaning it allows air and moisture to pass through the walls. This breathability is great for root health and prevents overwatering, but it also means soil dries out faster than in plastic pots. Terracotta is heavy, can crack in freezing temperatures, and may develop a white mineral crust over time from salt buildup. These pots are ideal for herbs and Mediterranean plants that prefer drier conditions.
Fabric Grow Bags
Fabric grow bags have become a favorite among experienced container gardeners, and for good reason. They are inexpensive, lightweight, and provide excellent aeration and drainage. The fabric naturally prunes roots by exposing root tips to air, which encourages a denser, healthier root system instead of the circular root binding common in hard pots. Grow bags dry out quickly, so they work best with regular watering or a drip irrigation setup. If you are looking for inspiration, browse these creative gardening pots design ideas to see how different container styles can work together.
Wood Planters
Wooden containers and planter boxes offer a natural look that blends beautifully with outdoor spaces. Cedar and redwood resist rot naturally, while treated lumber should be lined with plastic to prevent chemicals from leaching into the soil. Wood provides decent insulation for roots but will eventually deteriorate over several seasons if not maintained.
Metal Containers
Galvanized metal tubs and planters have a stylish, industrial aesthetic. However, metal conducts heat rapidly, meaning dark or sun-exposed metal containers can raise soil temperatures to dangerous levels and literally cook plant roots. If you use metal containers, line them with insulation, choose light-colored finishes, and position them where they receive afternoon shade.
Self-watering containers, also called sub-irrigated planters, feature a built-in water reservoir at the base. The plant draws water up through capillary action as needed, which means the soil stays consistently moist without the risk of overwatering. These planters are a practical choice for busy gardeners, vacation periods, and heat-sensitive crops. They are particularly effective for tomatoes, peppers, and other fruiting vegetables that demand steady moisture.
Elevated planter boxes stand on legs, bringing the planting surface to a comfortable working height. They are ideal for accessible gardening, balcony railings, and patios where bending down is difficult or impractical. Many elevated planters also include self-watering reservoirs for added convenience.
Without proper drainage, even the best potting mix will turn into a waterlogged mess that suffocates roots and invites fungal disease. Every container you use must have at least one drainage hole at the bottom. If your decorative pot does not have one, either drill holes yourself or use it as an outer cachepot and grow your plant in a smaller nursery pot that drains freely inside it.
A persistent myth suggests putting gravel, rocks, or broken pottery at the bottom of a container improves drainage. University extension services and experienced gardeners alike have debunked this. Adding a layer of gravel actually creates what is called a perched water table, where water accumulates above the gravel layer and saturates the soil above it. This raises the zone of saturated soil closer to your plant’s roots, increasing the risk of root rot. Skip the rocks and fill the entire container with potting mix instead.
Another drainage tip from the Oklahoma State University Extension: in hot, sunny locations, light-colored containers are preferable to dark ones. Dark containers absorb heat quickly and can raise the root zone temperature to lethal levels. If you must use dark pots, position them where they get morning sun and afternoon shade.
Consider elevating containers slightly off the ground using pot feet, bricks, or specialized risers. This allows water to flow freely from drainage holes and prevents the container from sitting in standing water, which can cause wood rot, staining on decks, and root problems.
The soil you put in your containers is not really soil at all. Quality potting mixes are engineered blends designed specifically for the unique conditions of container growing, where drainage, aeration, and moisture retention must all be balanced in a confined space. Understanding what goes into a good mix and how to feed your plants throughout the season will make or break your container garden.
This is the most important distinction in container gardening: never use regular garden soil or topsoil in your containers. Garden soil is too dense for pots. When packed into a container, it compacts, blocks airflow to roots, and holds too much water. The result is stunted growth, root rot, and dead plants.
Potting mix, by contrast, is a lightweight, soilless blend typically made from a combination of the following ingredients:
If you want to create your own mix, a reliable recipe is one part coco coir or peat moss, one part compost, and one part perlite. You can also add a handful of dolomite lime to balance pH and provide calcium and magnesium.
Container plants depend entirely on you for nutrients because the limited soil volume in a pot cannot sustain long-term feeding the way ground soil can. Every time you water, nutrients leach out through the drainage holes. This means regular fertilization is non-negotiable for productive container gardens.
Fertilizer labels display three numbers representing the NPK ratio: nitrogen (N), phosphorus (P), and potassium (K). Nitrogen drives leafy green growth, phosphorus supports root development and flowering, and potassium contributes to overall plant health and disease resistance. A balanced fertilizer such as 10-10-10 or 5-5-5 works well for most container vegetables and herbs. For fruiting crops like tomatoes and peppers, a formula slightly higher in phosphorus and potassium can encourage better fruit production.
You have two main options for feeding container plants, and many gardeners use both in combination for best results.
Slow-release fertilizers come as coated granules that gradually release nutrients over a period of 2 to 4 months. You mix them into the potting soil at planting time, and they feed your plants automatically with no additional effort. This is the easiest approach for beginners and provides a steady baseline of nutrition throughout the growing season.
Liquid fertilizers are dissolved in water and applied directly to the soil or as a foliar spray. They deliver nutrients immediately, making them ideal for giving plants a quick boost during active growth or fruiting. Fish emulsion, liquid kelp, and water-soluble balanced fertilizers are popular choices. Liquid feeding is typically done every one to two weeks during the growing season.
For best results, start with slow-release fertilizer mixed into your potting mix at planting time, then supplement with a diluted liquid fertilizer every two weeks once plants begin actively growing. Always follow package directions, as over-fertilizing can burn roots and damage plants just as easily as under-fertilizing. If you are interested in organic feeding methods, compost and composting practices can supplement your fertilizer routine naturally.
Watch for signs of nutrient problems. Yellowing lower leaves often indicate nitrogen deficiency. Purple-tinted leaves can signal phosphorus shortage. Stunted growth and poor fruiting may mean your plants need more potassium or that nutrients have leached out from frequent watering. Salt buildup from fertilizer can appear as a white crust on the soil surface; flush the container with clean water to resolve this.
Not every plant is suited for container life, but a surprising number of vegetables, herbs, fruits, and flowers flourish in pots. The key is choosing compact, bush, or dwarf varieties bred specifically for smaller spaces. Look for terms like “determinate,” “bush,” “patio,” “compact,” or “miniature” on seed packets and plant labels.
Many vegetables grow beautifully in containers, especially smaller and faster-maturing varieties. Determinate or bush-type tomatoes, such as cherry and patio varieties, are excellent choices that produce abundant harvests in 5-gallon pots. Peppers, both sweet and hot, are natural container plants that thrive in warm conditions. Bush beans produce quickly and do not require staking.
Leafy greens like lettuce, spinach, Swiss chard, and kale are perfect for containers because they have shallow root systems and grow quickly. Radishes and baby carrots can be grown in deeper containers. For a comprehensive guide on specific vegetables that work well, explore these best vegetables for container gardening or discover the best vegetables to grow in pots for surprising options.
Herbs are arguably the most rewarding container plants. They grow quickly, take up minimal space, and provide fresh flavors for cooking all season long. Basil, parsley, cilantro, chives, oregano, thyme, and rosemary all thrive in containers. Mediterranean herbs like rosemary and thyme actually prefer the drier conditions that terracotta pots provide. A windowsill herb garden is a perfect starting point for indoor container gardening.
Strawberries are a container gardening classic, producing sweet fruit from hanging baskets or tiered planters. Dwarf blueberry varieties can be grown in large pots with acidic potting mix. You can even grow dwarf fruit trees in containers, as seen in these peach tree container garden ideas designed for patio growing.
Flowers do more than add beauty to your container garden. Marigolds repel certain pests, making them excellent companion plants for vegetables. Petunias, geraniums, and calibrachoa provide long-lasting color in sunny spots. Lavender attracts pollinators and adds fragrance. If you want low-maintenance options, these easy care container plants are perfect for beginners. For broader inspiration, browse these container gardening ideas to visualize your space.
Different plants need different amounts of direct sunlight, and matching your plants to your available light is one of the most important factors in container gardening success. Before you buy plants, observe your growing space throughout the day to map where and when sunlight falls.
Sunlight Guide by Plant Category
If your space receives less than 4 hours of direct sun, focus on leafy greens, herbs, and shade-tolerant flowers. You can also supplement natural light with full-spectrum grow lights for indoor container gardening.
Now that you understand containers, soil, and plant selection, it is time to put everything together. Setting up your first container garden involves choosing the right location, deciding between seeds and seedlings, and following a clear planting process. We will walk you through each step so you can start with confidence.

Choosing where to place your containers is a decision worth thinking through carefully. The right spot provides adequate sunlight, protection from harsh weather, and convenient access for watering and harvesting. Once containers are filled with wet soil they become heavy, so plan your layout before filling pots.
Consider these factors when evaluating your space:
Every location creates its own microclimate, a small area with unique temperature, humidity, and light conditions. South-facing walls absorb heat during the day and release it at night, creating a warmer zone that can extend your growing season. Conversely, a breezy balcony between tall buildings may be several degrees cooler and windier than the surrounding area.
How you arrange your containers affects both the visual appeal and the growing conditions for your plants. A thoughtful layout maximizes sunlight exposure, improves air circulation, and makes maintenance easier.
One decision you will face is whether to start your plants from seeds or purchase young seedlings (also called transplants or starter plants). Each approach has advantages.
Starting from seeds is significantly cheaper, offers a wider selection of varieties, and gives you the satisfaction of growing a plant from the very beginning. Seeds are ideal for fast-growing crops like lettuce, radishes, bush beans, and most herbs. However, seeds require more time, attention, and the right germination conditions, including warmth and consistent moisture.
Buying seedlings gives you a head start of 4 to 8 weeks and is the practical choice for slow-growing crops like tomatoes, peppers, and eggplant, especially in shorter growing seasons. Seedlings let you skip the germination phase entirely and are more forgiving for beginners. The tradeoff is higher cost per plant and a limited variety selection compared to what is available as seed.
A good strategy for beginners is to buy seedlings for longer-season crops and start quick-growing vegetables and herbs from seed. This gives you the best of both worlds while keeping costs reasonable.
Follow these steps to plant your container garden correctly from the start:
If you want even more arrangement and design ideas, these container meditation garden ideas show how containers can create peaceful outdoor spaces.

Watering is the single most important maintenance task in container gardening, and it is also where most beginners go wrong. Containers dry out far faster than garden beds because the soil volume is smaller and the sides of the pot are exposed to air and heat. During hot summer weather, you may need to water daily, or even twice a day for smaller pots.
For gardeners who travel frequently or have busy schedules, consider installing a drip irrigation system with a timer or investing in self-watering containers. These systems maintain consistent soil moisture and dramatically reduce the daily maintenance burden.
Because nutrients leach out of containers with every watering, your plants need regular feeding throughout the growing season. A practical schedule looks like this: mix slow-release fertilizer into the potting soil at planting time, then begin liquid feeding every two weeks once plants show active growth. Switch to weekly liquid feeding during heavy fruiting periods for tomatoes and peppers. Reduce feeding in late summer as plants wind down.
Organic options include fish emulsion, liquid kelp, compost tea, and worm castings. These feed the soil ecosystem along with your plants and are less likely to cause fertilizer burn than synthetic options. Whatever fertilizer you choose, always read and follow the label instructions.
Container gardens generally face fewer pest problems than in-ground gardens, but they are not immune. The key to managing pests and diseases is early detection and prompt action. Inspect your plants regularly, checking the undersides of leaves where insects like to hide.
Common container pests include:
Common diseases to watch for:
For pest prevention, keep your containers clean, remove dead leaves and debris promptly, and consider companion planting. Marigolds, nasturtiums, and certain herbs can deter common pests when planted alongside vegetables. If intervention becomes necessary, start with the least toxic option. Insecticidal soap, neem oil, and horticultural oils are effective organic sprays that are safe for food crops when used as directed. Introducing beneficial insects like ladybugs and lacewings can also help control aphid and mite populations naturally.
Every experienced container gardener has a story about their first failed attempt. The good news is that nearly every common mistake is preventable once you know what to watch for. Here are the most frequent pitfalls that undermine container gardens:
One of the questions we hear most often is whether container gardening truly works for apartments and small balconies. The answer is a resounding yes. With thoughtful planning, even the smallest space can support a productive and beautiful container garden.
For apartment gardening and balcony gardens, vertical growing is your best friend. Use railing planters, hanging baskets, wall-mounted pockets, and tiered plant stands to maximize your growing area without consuming floor space. A single balcony railing can hold an entire herb garden, while a corner shelf can support multiple levels of salad greens and strawberries.
Choose compact and bush varieties bred specifically for containers. Patio tomatoes, bush cucumbers, dwarf peppers, and miniature basils produce impressive yields in surprisingly small pots. If your balcony is windy, choose shorter plants and secure taller containers to prevent tipping. For gardeners who want to transform their outdoor space visually, explore these container plants for your outdoor space that add privacy and beauty.
Indoor container gardening is also a viable option. A sunny south-facing window or a set of full-spectrum LED grow lights can support herbs, microgreens, lettuce, and even compact pepper varieties year-round. For more design inspiration, check out these container gardening ideas that work in any size space.
The best plants for container gardening include cherry tomatoes, peppers, lettuce, spinach, radishes, bush beans, herbs (basil, parsley, cilantro, rosemary), strawberries, and compact flowers like marigolds and petunias. Choose varieties labeled as bush, patio, determinate, or dwarf for the best results in confined spaces.
The most common mistake is overwatering, which causes root rot and kills more container plants than any other factor. Watering on a fixed schedule rather than checking soil moisture is the primary cause. Always test the soil by sticking your finger an inch deep before watering, and ensure every container has drainage holes.
The 70/30 rule suggests filling your container with 70% high-quality potting mix and leaving the top 30% for managing watering, mulching, and plant spacing. Some interpret it as maintaining 70% soil moisture content for optimal plant health. Either way, the principle emphasizes using quality growing medium and monitoring moisture levels consistently.
Container gardens dry out faster than in-ground gardens and require more frequent watering. Plants in pots depend entirely on you for nutrients since they cannot access ground soil. Containers can be expensive to set up initially, and large pots become heavy and difficult to move. In freezing climates, perennials in containers need winter protection since roots are more exposed to cold than in the ground.
Water when the top inch of soil feels dry, which typically means every 1 to 3 days during normal weather and daily during heat waves. Small containers and fabric grow bags dry out faster than larger pots. Always check soil moisture before watering rather than following a rigid schedule.
Mix slow-release fertilizer into the potting soil at planting time, then feed with a diluted liquid fertilizer every 1 to 2 weeks once plants begin actively growing. During heavy fruiting periods, increase to weekly liquid feeding. Always follow package directions to avoid over-fertilizing.
Yes. Indoor container gardening works well for herbs, microgreens, lettuce, and compact pepper varieties. Place plants in a south-facing window that receives at least 6 hours of sunlight, or use full-spectrum LED grow lights to supplement natural light. Ensure indoor containers have drainage trays to protect surfaces.
Deep-rooted crops like full-size carrots and parsnips need significant soil depth. Large vining plants like pumpkins, watermelons, and full-size winter squash require too much space. Corn needs pollination from surrounding plants and wind, making it poorly suited to containers. Standard-size asparagus and rhubarb are perennial crops that need permanent in-ground space.
Lettuce, radishes, bush beans, Swiss chard, kale, cherry tomatoes, and most herbs are forgiving and productive choices for first-time container gardeners. These plants germinate quickly, tolerate a range of conditions, and produce harvests within weeks to a couple of months.
Most vegetables need at least a 3 to 5 gallon container (12 to 14 inches wide and deep). Fruiting plants like tomatoes require a minimum 5-gallon pot. Herbs and leafy greens can grow in 1 to 2 gallon containers. Deeper containers hold moisture longer and support healthier root systems.
Container gardening opens the door to growing your own food and flowers regardless of where you live. With the right containers, quality potting mix, appropriate plant choices, and consistent watering and feeding, you can build a thriving garden on a balcony, patio, rooftop, or even a sunny windowsill. The beauty of container gardening for beginners is that the learning curve is gentle and the rewards are immediate.
Start small with a few herbs and a cherry tomato plant, learn from the experience, and expand each season. Avoid the common mistakes we covered, pay attention to your plants’ signals, and do not be afraid to experiment with new varieties and container types. Every gardener’s first attempt includes a few failures, and that is part of the process.
Key takeaways to remember:
Container gardening is more than a hobby; it is a practical, sustainable way to grow fresh food and beautify your living space. Grab a pot, fill it with quality mix, plant something you love, and watch your garden come to life. The journey starts with a single container.
